Looking for a free HDPE welding procedure PDF is common when you need a quick reference for training, site audits, or standardizing field work. The challenge is that “free” downloads are often incomplete, not matched to your pipe system, or missing the critical steps that actually protect joint quality (surface prep, heater control, pressure management, and cooling discipline).
This guide explains where you can legitimately find a free HDPE welding procedure PDF, what a good procedure document must include, and a step-by-step butt fusion workflow you can use to build your own procedure pack for your team or project.
Key idea:
A “HDPE welding procedure” is only useful if it matches your pipe standard, diameter, wall thickness (SDR), material grade, and machine type—otherwise the numbers and sequence can mislead operators.
Where Can I Download a Free HDPE Welding Procedure PDF?
Below are the most practical and ethical places to find procedure PDFs or procedure-like documents you can use as a baseline. In many cases, the “download” is provided by a standards body, a training organization, an owner/operator specification, or a welding equipment manufacturer’s technical documentation.
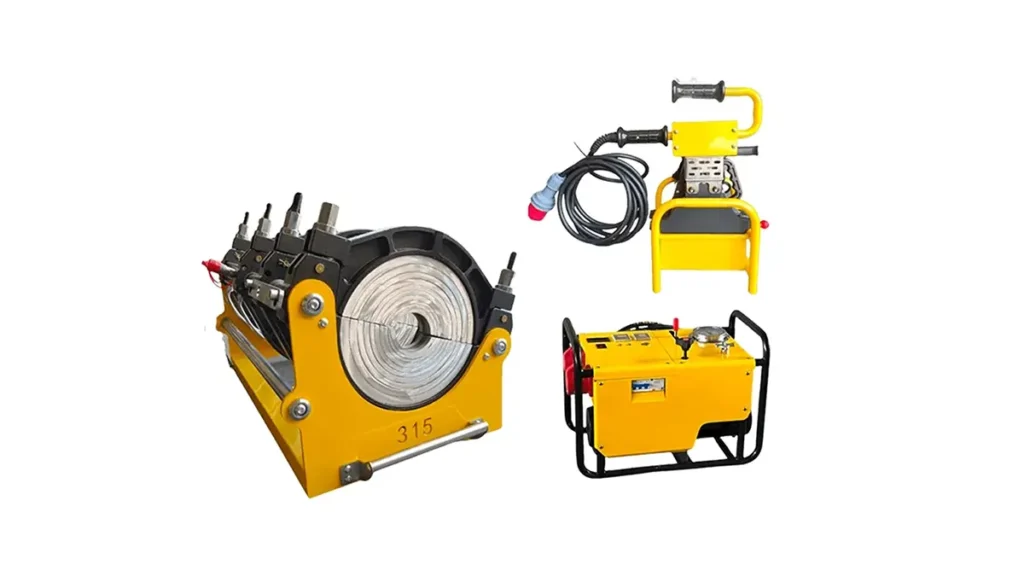
1) Equipment manufacturers’ knowledge bases and manuals
Manufacturers often publish user manuals, parameter charts, and operating guides that function like a welding procedure when used with the correct pipe standard. If your project uses butt fusion, it’s smart to pair your procedure with the machine’s operating guidance, maintenance checks, and clamp/face alignment requirements.
If you’re selecting or standardizing equipment for pipeline work, you can review solutions from a professional supplier such as butt fusion machine resources and request the right technical documents for your exact model and application.
2) Project specifications from utilities, municipalities, or EPC contractors
Many water, gas, mining, and industrial projects issue “installation specifications” that include HDPE butt fusion requirements: operator qualification, bead inspection criteria, pressure testing rules, and traceability records. These are sometimes publicly accessible via procurement portals or document libraries. Even when you cannot download the full spec, you can often obtain the fusion section legally from the project owner.
3) Training organizations and industry associations
Some training providers publish sample procedures, checklists, or quick-reference sheets. These may not be full WPS documents, but they can be used to structure your own procedure pack (especially for onboarding new operators and ensuring consistent daily checks).
4) Standards bodies (sometimes free, sometimes paywalled)
Many of the most authoritative fusion procedures are based on standards. Standards documents are often paid, but certain jurisdictions, libraries, or public safety initiatives provide limited free access. If you see a “free PDF” claiming to be a complete standard, verify it—unofficial copies can be outdated or altered.
✔ Tip:
If you must start with a free PDF, treat it as a template. Then validate the variables (heater temperature range, drag pressure handling, bead size, heat soak time, changeover, fusion pressure, and cooling time) against your applicable standards and your pipe supplier’s recommendations.
What a High-Quality HDPE Welding Procedure PDF Should Include
A useful procedure PDF is not just “steps.” It must define acceptance, traceability, and the parameters that control joint strength. Before you download or adopt any file, check that it contains the essentials below.
Must-have sections
- Scope: butt fusion vs electrofusion, pipe/fitting types, field vs shop conditions.
- Applicable standards: which code/spec the procedure is based on.
- Material details: PE grade, SDR range, diameter range, fittings, and component compatibility.
- Equipment requirements: facing tool condition, heater plate temperature tolerance, clamps, and alignment.
- Parameters & variables: pressure method (including drag), bead size targets, timing windows, cooling rules.
- Inspection & acceptance: bead appearance criteria, misalignment limits, recording forms.
- Operator qualification: training, test joints, and ongoing competency checks.
- Safety: hot surface handling, pinch points, hydraulic hazards, and site controls.
Step-by-Step HDPE Butt Fusion Welding Procedure (Field-Friendly)
The sequence below is a practical “procedure skeleton” you can adapt into a PDF checklist. It focuses on the process controls that most commonly cause failures: poor facing, contaminated surfaces, wrong heater conditions, incorrect pressure handling, and rushed cooling.
Step 1: Confirm pipe compatibility and job conditions
Verify that both components are compatible (material grade, SDR, diameter, manufacturer guidance). Confirm environmental conditions and any shelter requirements (wind, dust, rain). If conditions may contaminate the melt surfaces, establish a controlled fusion area.
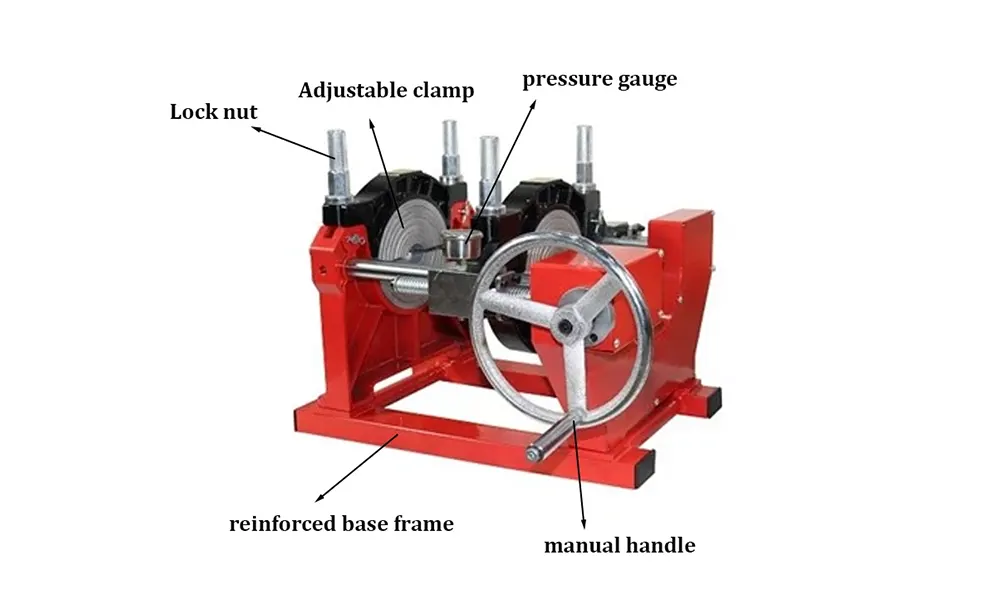
Step 2: Verify machine readiness and alignment
Inspect the fusion machine: clamps tighten evenly, carriage movement is smooth, and the hydraulic system holds stable pressure. Confirm the heater plate is clean and the facing tool blades are sharp and secure. Check that the pipe ends can be aligned without excessive force.
⚠ Critical:
Many “free procedures” skip alignment detail. In practice, misalignment and uneven clamp pressure can create asymmetric beads and reduce joint performance even if temperatures and times look correct.
Step 3: Prepare (clean) the pipe ends
Remove dirt, moisture, and surface contamination from the outside and inside near the joint area using clean, non-shedding wipes and an approved cleaning method. Keep cleaned ends protected from re-contamination. If the pipe has oxidation or weathered surface, proper facing will remove it.
Step 4: Clamp and round the pipe
Load both pipe ends into the clamps with enough insertion length to face cleanly and fuse without slippage. Tighten clamps to hold the pipe firmly. If the pipe is ovalized, round it per your standard practice before proceeding. The goal is uniform contact during heating and fusion.
Step 5: Face the pipe ends (machining)
Install the facing tool and face both ends simultaneously until continuous shavings indicate full surface cleanup. Remove the facing tool carefully to avoid touching the prepared ends. Ensure the ends are flat and square to the pipe axis, with minimal gap when brought together.
Facing acceptance checks (simple field checks)
- Pipe ends meet evenly with no visible high-low around the circumference.
- Gap is within your standard’s allowable limit.
- Freshly faced surfaces are protected from dirt, water, and handling.
Step 6: Set and verify heater plate temperature
Heat the plate to the specified setpoint and verify the surface temperature is stable (not just the controller reading). The plate must be clean and coated per manufacturer guidance. Keep the heater protected from wind that can cause uneven heating.
Step 7: Determine drag pressure (hydraulic machines)
For hydraulic fusion, determine the drag pressure needed to move the carriage with the pipe clamped. Record it and incorporate it into your fusion pressure method per your standard (many procedures require adding drag to achieve correct interface pressure).
Step 8: Initial heating (bead-up)
Bring the pipe ends into contact with the heater plate and apply the required initial pressure to form a uniform bead around both ends. This stage ensures full contact and helps manage surface irregularities.
Step 9: Heat soak (thermal soak)
Reduce to the specified soak pressure (often near zero or a low value depending on the procedure) and hold for the required time based on wall thickness/SDR. The objective is to achieve the proper melt depth without overheating or excessive material displacement.
Step 10: Changeover (heater removal) within the allowed time
At the end of heat soak, separate the pipe ends, remove the heater plate smoothly, and bring the molten ends together. The changeover time is critical: too slow and the melt cools and skins over; too fast and you risk misalignment or contamination.
⏱ Focus point:
A good procedure PDF always specifies a maximum changeover time. If your “free PDF” does not, it’s not complete enough for reliable field control.
Step 11: Apply fusion pressure and hold
Apply the specified fusion pressure to achieve a consistent double-roll bead around the circumference. Hold the pressure steady for the required time. Avoid “pumping” the pressure, and do not disturb the joint.
Step 12: Cooling under pressure (and final cooling)
Maintain the joint in the clamps for the minimum cooling time required by the procedure. After the initial cooling period, the assembly may be removed from clamps if allowed, but it must continue cooling without bending, impact, or load until the full cooling time is met.
Step 13: Visual inspection and documentation
Inspect bead size, symmetry, and uniformity. Look for signs of contamination (voids, pits, discoloration), misalignment, or incomplete fusion. Record key parameters (heater temp, pressures, times, operator ID, joint number, and location) as required by your project.
How to Evaluate a “Free HDPE Welding Procedure PDF” Before Using It
Even if a PDF looks professional, treat it like an unverified process document until you confirm it matches your job. Use the checks below to avoid adopting unsafe or ineffective guidance.
Quick verification checklist
- Does it specify variables? (SDR, diameter range, material grade, ambient limits)
- Does it control heater temperature properly? (tolerance and verification method)
- Does it address drag pressure? (for hydraulic equipment)
- Does it define changeover time? (max allowable)
- Does it define cooling rules? (in-clamp and off-clamp)
- Does it include acceptance criteria? (visual bead criteria + misalignment limits)
- Is it current? (revision date, issuer, applicability)
Common Reasons HDPE Butt Fusion Joints Fail (And What a Good PDF Prevents)
Most failures aren’t mysterious—they come from repeatable process breakdowns. A strong procedure PDF functions like a guardrail by forcing consistent checks and recordings.
Contamination at the melt surface
Dust, water, oil, or handling the faced ends can introduce defects. Procedures should specify cleaning steps and require protecting faced surfaces until heating begins.
Incorrect heater temperature or uneven heating
If the heater plate is outside tolerance or exposed to strong wind, melt quality suffers. Procedures should require stable temperature verification and clean plate practices.
Poor facing and alignment
If the ends aren’t flat and aligned, you can get uneven beads and stress concentration. Procedures should include objective checks before heating.
Wrong pressure management (especially ignoring drag)
Hydraulic butt fusion depends on correct interface pressure. A good procedure explains how to account for drag and how to hold pressure steadily.
Rushing the cooling stage
Moving or loading the joint too soon can cause micro-cracking or deformation. Procedures should define clamp cooling and handling restrictions.
Building Your Own “Procedure PDF Pack” (When You Can’t Find the Perfect Free One)
If you can’t locate a free HDPE welding procedure PDF that matches your exact conditions, build a simple pack that your team can follow consistently. Even a short, controlled checklist can outperform a generic “download” if it is accurate for your project.
Suggested pack contents
- One-page step sequence: facing → bead-up → soak → changeover → fuse → cool → inspect.
- Parameter table: values by SDR and wall thickness (from your standard/spec).
- Daily machine checklist: heater temp verification, facer condition, clamp alignment.
- Joint record form: operator, time, pipe lot, pressures, times, location.
- Visual acceptance sheet: examples described in words (no images required).
Why Machine Quality and Support Matter as Much as the PDF
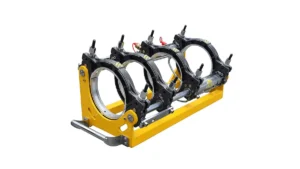
A procedure document cannot compensate for unstable heater control, misaligned clamps, or inconsistent hydraulic pressure. For global pipeline projects, many contractors standardize not only the written procedure but also the equipment platform, testing routines, and operator training pathway.
JQ-Fusion, for example, focuses on manual, hydraulic, and CNC automatic butt fusion welding machines across a wide diameter range, with manufacturing controls that emphasize temperature accuracy, hydraulic pressure stability, and clamp alignment inspection—factors that directly support repeatable welding results in real projects. If you need a procedure that fits your equipment and job, it’s often more reliable to request model-specific guidance than to rely solely on an anonymous free PDF.
Frequently Asked Questions (FAQ)
1) Are free HDPE welding procedure PDFs safe to use on site?
They can be, but only after you verify they match your applicable standard, pipe material/SDR, and machine type, and that they include pressure, timing, changeover, and cooling controls.
2) What’s the biggest missing item in many free procedure downloads?
Clear control of drag pressure (hydraulic machines) and a stated maximum changeover time.
3) Can one procedure cover all diameters and SDRs?
Rarely. Good procedures define ranges and provide parameter tables or rules tied to wall thickness/SDR so the operator doesn’t guess.
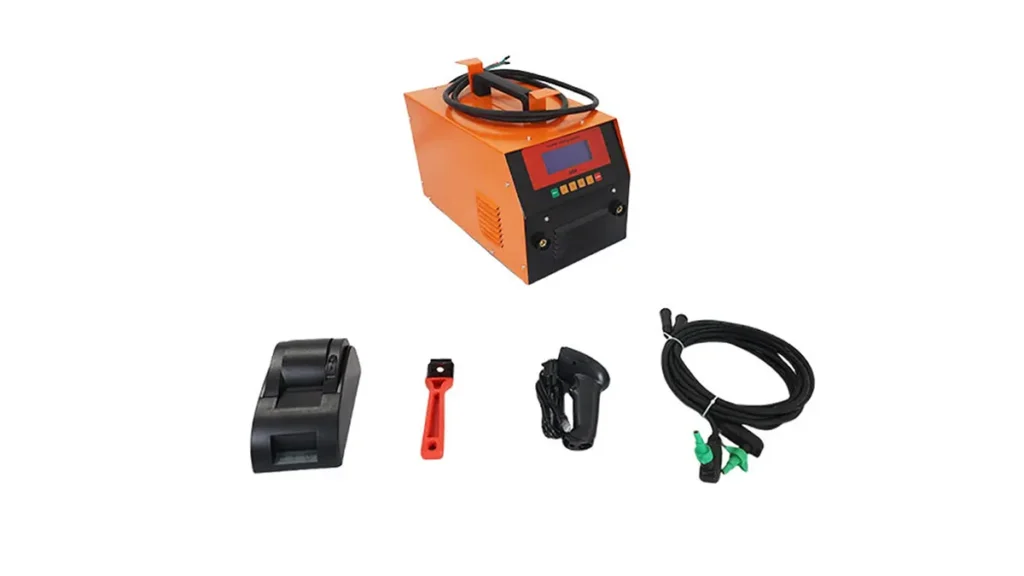
4) Do I need separate procedures for butt fusion and electrofusion?
Yes. They are different processes with different failure modes, equipment controls, and acceptance requirements.
5) If my beads look good, is the joint automatically good?
No. Visual inspection helps, but true quality depends on the full process: facing, cleanliness, heater control, correct pressure, proper changeover, and cooling discipline.