Learning HDPE welding from scratch can feel intimidating at first, especially if you have never worked with pipeline systems, plastic fabrication, or thermal joining equipment. The good news is that butt fusion welding is a highly teachable process once you understand the basic materials, the machine functions, and the sequence of steps that create a strong, leak-free joint. Whether you are preparing for a job in water supply, gas distribution, mining, or industrial piping, mastering the fundamentals will give you a solid foundation for real project work.
HDPE, or high-density polyethylene, is widely used because it is lightweight, corrosion-resistant, flexible, and durable. These qualities make it ideal for underground and above-ground pipeline installations. However, the same characteristics that make HDPE useful also mean the welding process must be precise. Temperature control, pressure control, alignment, and cooling time all matter. If any one of these steps is rushed or done incorrectly, the finished joint may not perform as expected.
To learn HDPE welding effectively, you should start by understanding the main welding methods available. The most common approach for large-diameter HDPE pipelines is butt fusion welding, where two pipe ends are heated and pressed together under controlled conditions until they fuse into one continuous structure. Other methods such as electrofusion are also used in certain applications, but butt fusion remains one of the most important techniques for contractors and installers to learn first.
Key idea: HDPE welding is not about force; it is about consistency. The best results come from following the correct procedure step by step and using equipment that delivers stable heating, pressure, and alignment.
Before you begin learning on the machine, study the material itself. HDPE behaves differently from metal, so techniques that work in steel fabrication do not apply here. You need to know how HDPE responds to heat, how contaminants affect fusion, and why pipe preparation is essential. Clean, dry, and properly trimmed pipe ends create the best conditions for a strong weld. Dust, oil, moisture, and uneven cutting can all weaken the joint.
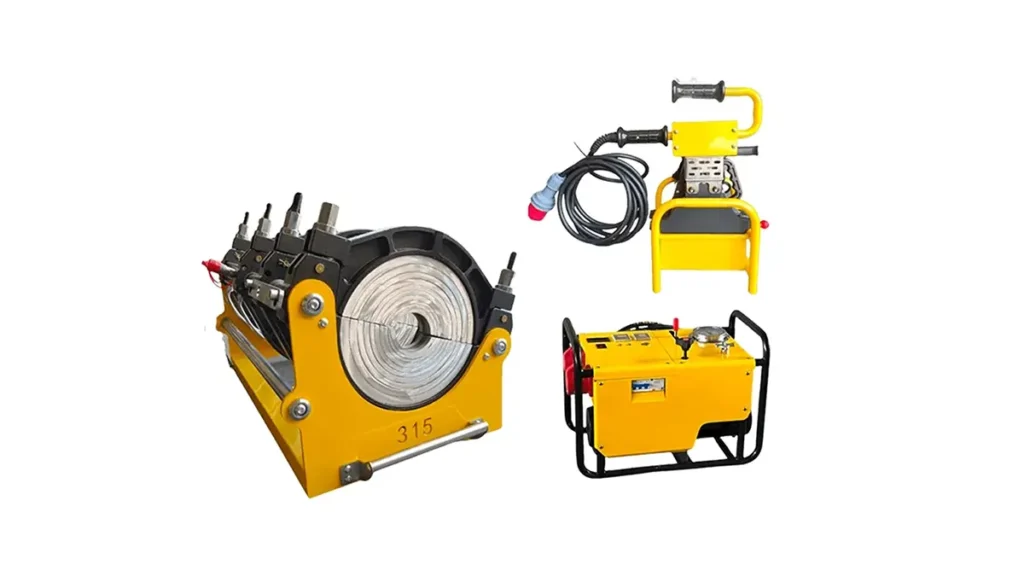
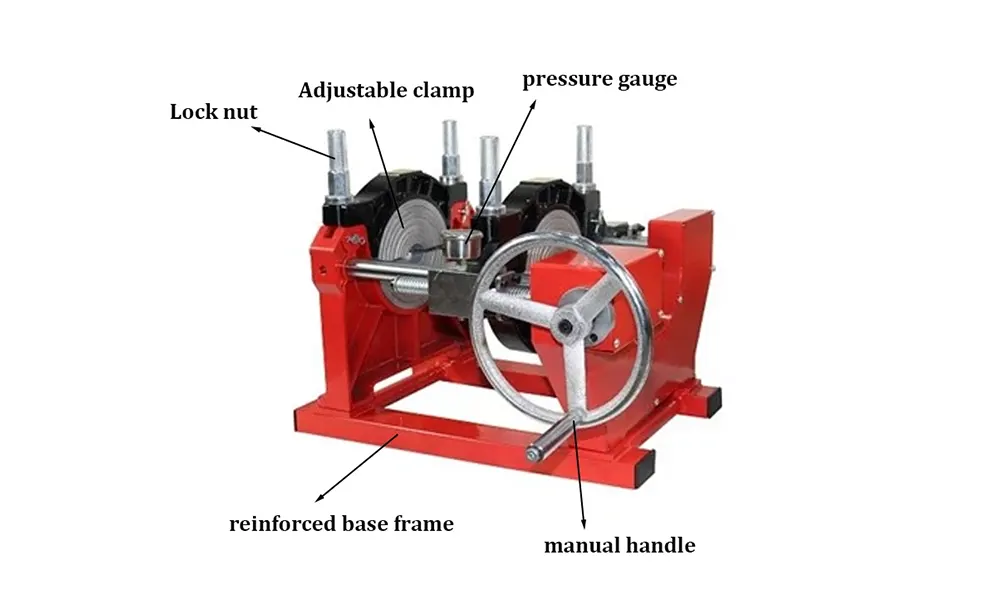
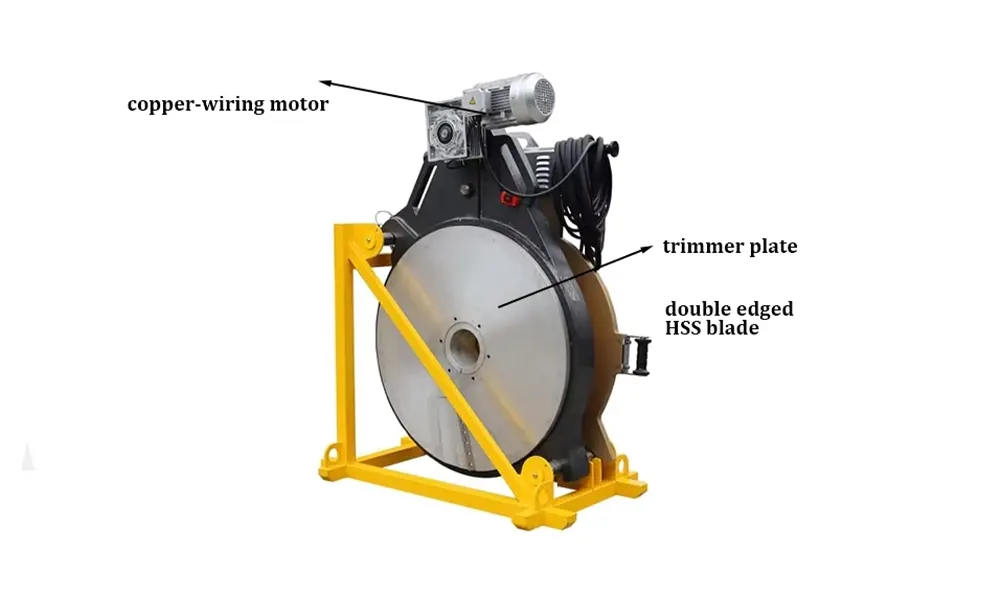
Next, learn the main parts of a butt fusion setup. A typical system includes a frame, clamps, hydraulic or manual controls, a facing tool, a heating plate, and a control unit. Each component has a clear role. The clamps hold the pipes in alignment, the facer creates smooth and square ends, and the heating plate softens the pipe surfaces to the correct fusion temperature. Once heated, the pipes are brought together under pressure to create the weld. If you are new to the process, the machine layout may seem technical, but after a few practice sessions it becomes much easier to understand.
If you want a reliable learning path, it helps to work with equipment from an experienced manufacturer that supports training and technical guidance. For example, a professional butt fusion machine supplier can provide machines suitable for beginners and experienced crews alike, along with the consistency needed for real-world projects. Choosing dependable equipment can make the learning process smoother and safer.
Step 1: Learn the safety basics first
Safety should always come before practice. HDPE welding involves hot surfaces, electrical components, hydraulic pressure, and heavy pipe sections. Wear proper gloves, protective eyewear, and appropriate work clothing. Keep your work area organized and dry. Make sure you know where the emergency stop controls are located and understand the machine’s operating instructions before starting. A calm, controlled environment helps reduce mistakes and protects both the operator and the material.
Important: Never touch the heating plate directly and never try to speed up cooling with water or forced handling. Uneven cooling can damage the weld.
Step 2: Understand pipe preparation
Pipe preparation is one of the most important skills in HDPE welding. Start by confirming that the pipe sizes, wall thicknesses, and materials match the project requirements. Insert the pipe sections into the clamps and check alignment carefully. The pipe ends should be centered, stable, and ready for facing. Use the facer to trim both ends until they are smooth and square. This creates a uniform contact surface for the heating stage.
After facing, clean the pipe surfaces carefully. Remove all loose plastic shavings, dust, and debris. The pipe ends should not be touched with dirty hands or placed on contaminated ground. Even small particles can interfere with fusion and reduce the strength of the weld. Beginners often underestimate this step, but experienced welders know that preparation is what separates a weak joint from a dependable one.
Common preparation mistakes to avoid
• Cutting the pipe unevenly
• Leaving shavings or dust on the fusion surface
• Failing to align the pipe ends correctly
• Handling the heated surfaces too soon
Step 3: Learn how the heating cycle works
The heating cycle is where the pipe ends are brought to fusion temperature using the heating plate. This stage requires patience and control. The plate should be at the correct temperature before contact begins, and the pipe ends should be heated for the proper amount of time based on the pipe size and machine settings. If the temperature is too low, fusion may be weak. If it is too high, the material may degrade.
During training, pay close attention to the bead formation on the pipe ends. A uniform melt bead usually indicates that the surfaces are heating correctly. This visual cue is useful for beginners because it helps you recognize whether the process is progressing normally. As you gain experience, you will become more confident in reading the machine, the material response, and the timing of each stage.
Pro tip: The heating stage is not the time to rush. Accurate timing and stable temperature are more important than speed.
Step 4: Practice the fusion and joining process
Once the pipe ends have been heated correctly, the heating plate is removed and the pipe ends are brought together under controlled pressure. This is the moment of fusion. The surfaces must meet evenly and remain aligned. If the pipe sections shift or rotate, the joint can become uneven. A strong bead around the joint often shows that the fusion has been successful, but bead appearance alone should never replace proper procedure.
The joining process is one of the skills that improves with practice. Beginners often need repeated training to develop the right rhythm: heating, removing the plate, joining quickly, and maintaining pressure during the initial cooling phase. Keep in mind that every pipe diameter and wall thickness may require slightly different timing and pressure settings. Always refer to the machine’s operating guide and project specifications.
For those who are working with larger installations, equipment quality becomes even more important. A well-built machine from a trusted supplier can improve alignment accuracy and pressure stability, both of which are essential in field conditions. Consistency matters just as much as operator skill.
Step 5: Master cooling and inspection
After fusion, the joint must cool naturally while maintaining proper pressure. This cooling stage is often ignored by beginners, but it is critical for weld strength. If the joint is disturbed too early, internal stress can develop and reduce performance. Allow the weld to cool according to the recommended time for the pipe size and ambient conditions.
Once cooling is complete, inspect the weld carefully. Look for even alignment, consistent bead formation, and signs that the pipe ends fused uniformly. In professional projects, quality checks may include temperature records, hydraulic pressure verification, and clamp alignment inspection. These controls help ensure that the weld meets project standards and performs reliably in service.
Inspection checklist: correct alignment, even bead, proper cooling, clean surfaces, and no visible contamination or deformation.
How to build skill faster as a beginner
The fastest way to learn HDPE welding is through guided practice. Start with supervised training, then move to hands-on repetition using different pipe sizes and configurations. Ask experienced operators to explain why each step matters, not just how to perform it. This helps you build judgment, not only memory. You should also spend time reading machine manuals, technical guides, and project requirements so that you understand the logic behind the procedure.
It is also useful to train with equipment that offers stable performance and simple operation. Manual, hydraulic, and CNC automatic butt fusion machines each have advantages, depending on the project and the operator’s experience level. Beginners often benefit from machines that make alignment and pressure control easier to monitor. As your skill grows, you can progress to more advanced systems and larger pipe diameters.
Many contractors choose suppliers with proven manufacturing strength, quality control, and customization options because these factors support long-term learning and practical use. A machine that is stable, durable, and easy to maintain gives new operators the confidence to focus on technique instead of fighting unreliable equipment.
Why machine quality matters in HDPE welding
HDPE welding is highly dependent on machine performance. If the heating plate temperature is unstable, the fusion result may vary. If the clamps do not hold alignment properly, the pipe ends may shift. If hydraulic pressure is inconsistent, the joint may not bond as intended. That is why professional welders and contractors often choose machines from manufacturers with strong production systems, testing procedures, and global support.
For example, companies with long industry experience, modern manufacturing facilities, and strict quality control can provide machines that perform consistently across different projects. This is especially valuable in water supply networks, gas installations, mining systems, and industrial pipelines, where weld reliability directly affects safety and service life.
When selecting equipment, look for features such as accurate temperature control, stable hydraulic operation, strong clamp alignment, and support for different pipe diameters. These details may seem technical at first, but they make the learning process easier and the finished welds more dependable.
A simple learning roadmap
1. Learn HDPE material behavior
2. Understand machine components and safety rules
3. Practice pipe preparation and alignment
4. Train on heating, joining, and cooling cycles
5. Inspect results and refine technique through repetition
Frequently asked questions
Q1: Can I learn HDPE welding without prior experience?
Yes. Many operators start from zero and learn through structured training, practice, and machine-guided procedures.
Q2: Is butt fusion the best place to start?
For many beginners, yes. Butt fusion is one of the most common and foundational methods for HDPE pipeline work.
Q3: How important is machine quality when learning?
Very important. Stable temperature, accurate pressure, and reliable clamping make training easier and results more consistent.
Q4: What is the biggest beginner mistake?
Skipping preparation. Poor pipe cleaning, incorrect alignment, or rushing the cooling stage can all weaken the weld.
Q5: How long does it take to become confident?
It depends on training quality, practice frequency, and project complexity. Most beginners improve quickly once they repeat the full process under supervision.
Learning HDPE welding from scratch is absolutely possible when you approach it step by step. Start with safety, understand the material, practice preparation, and focus on consistent machine operation. With the right training and reliable equipment, you can build the confidence to produce strong, professional-quality welds that meet real project demands.