The butt fusion machine is one of the most important tools in modern HDPE pipeline construction. It is designed to join plastic pipes and fittings by heating their ends and pressing them together under controlled pressure until they form a single, seamless connection. When used correctly, it delivers strong, leak-resistant joints that can perform reliably in water supply systems, gas distribution networks, mining projects, and industrial pipeline installations.
For contractors, welders, and project managers, understanding how to operate a butt fusion machine is not only about making a weld. It is about maintaining safety, protecting pipe quality, achieving consistent results, and improving project efficiency. Whether you are using a manual unit, hydraulic model, or CNC automatic system, the basic welding logic is the same: clean preparation, accurate alignment, correct heating, proper fusion pressure, and sufficient cooling time.
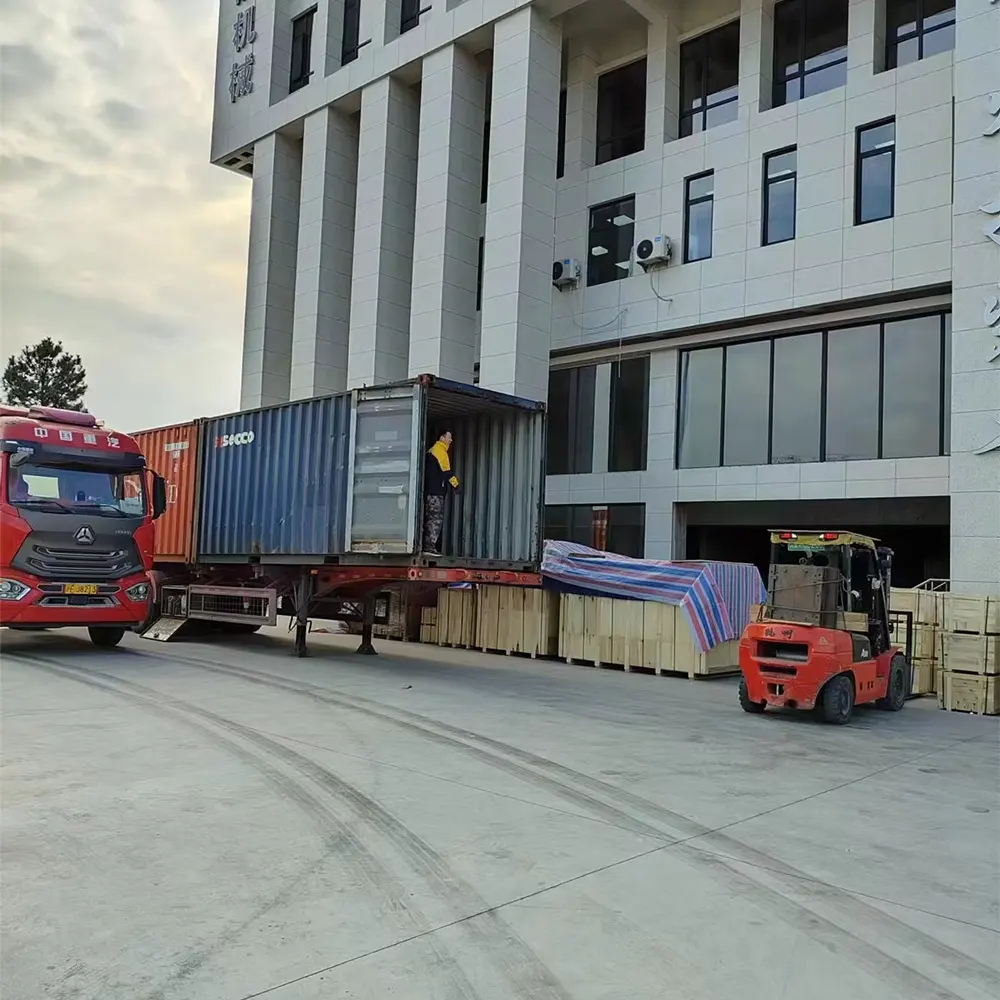
Before starting any welding job, always make sure the machine is in good condition, the pipe material is compatible, and the work area is safe and stable. Good equipment and correct operation go hand in hand. Manufacturers like JQ-Fusion support global pipeline projects with durable equipment, customization options, and technical guidance, which helps teams achieve dependable results in demanding environments.
What a Butt Fusion Machine Does
A butt fusion machine joins two thermoplastic pipe ends by heating them with a hot plate and then pressing them together under specified force. The process melts the facing surfaces, and when the heat source is removed, the softened ends are brought into contact and fused. After cooling, the joint becomes as strong as the surrounding pipe material in many applications.
✔ Key advantage: a properly fused joint can provide excellent sealing performance without using adhesives, gaskets, or mechanical connectors.
This method is widely used because it creates a continuous pipeline system with fewer leak points. It also supports long-distance networks where durability, corrosion resistance, and low maintenance are essential. For this reason, butt fusion welding has become a standard method in many industrial and municipal projects.
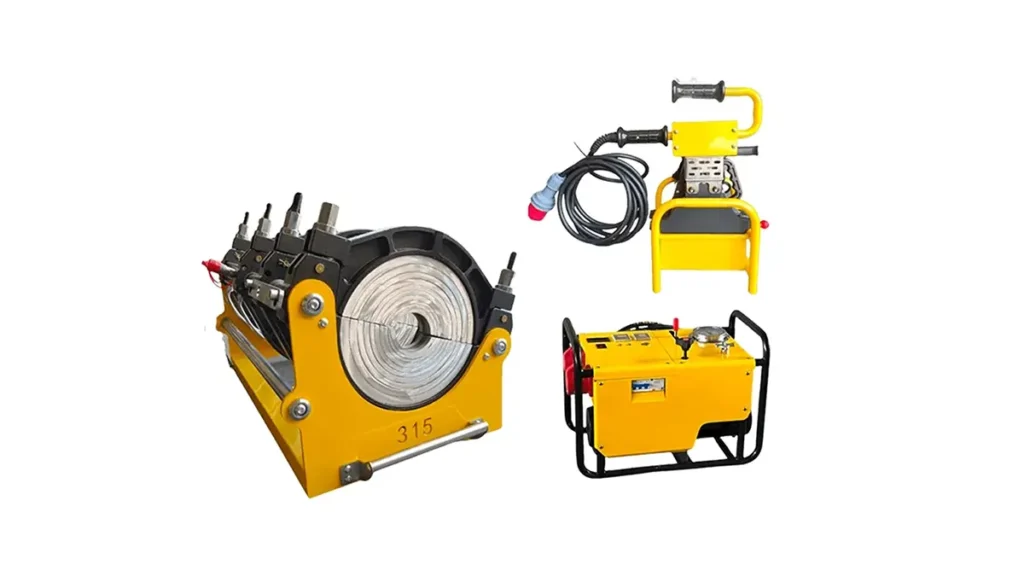
Main Parts of the Machine
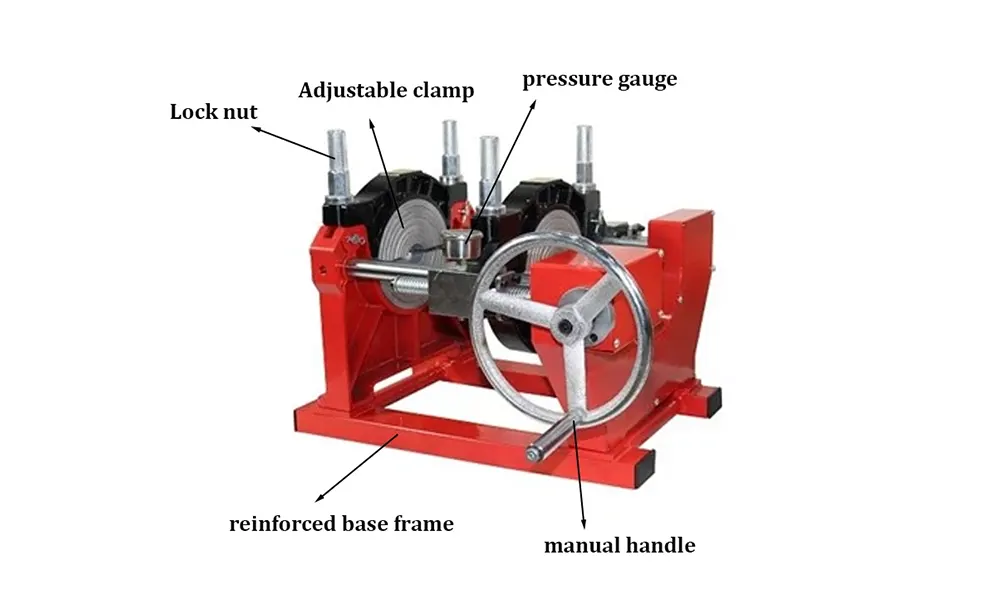
Although designs vary by model, most butt fusion machines include several core components: a frame, clamps, hydraulic unit, heating plate, trimmer, and control system. The frame holds the pipe ends in position. The clamps secure the pipes and ensure alignment. The hydraulic system applies and maintains welding pressure. The heating plate provides controlled temperature for melting the pipe ends. The trimmer creates smooth and even pipe faces before heating.
Important: clamp alignment and heating plate temperature accuracy directly affect weld quality. Even a small error can lead to weak joints, ovality, or poor fusion.
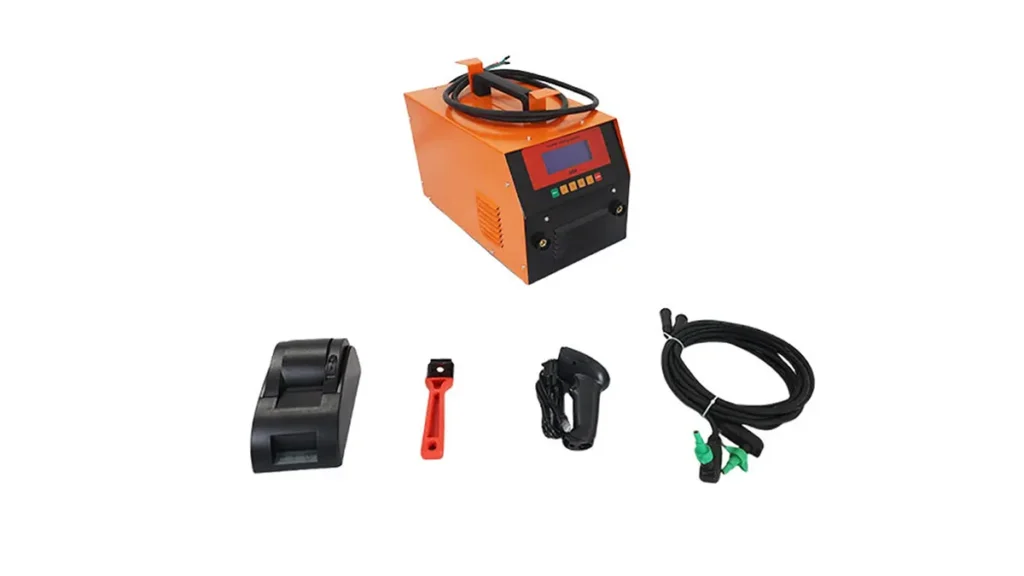
Automatic and CNC models often include digital controllers that make operation easier and more repeatable. Manual machines rely more on operator skill, but they can still deliver excellent results when the procedure is followed carefully. Hydraulic machines are especially useful for medium and large pipe diameters because they help maintain stable pressure throughout the cycle.
Step 1: Prepare the Work Area
Start by selecting a clean, dry, and level work area. The machine should be placed on stable ground to avoid movement during the welding cycle. Make sure the environment is protected from rain, dust, excessive wind, and direct contamination. If the job is outdoors, use a shelter or temporary cover when necessary.
The power supply should match the machine’s voltage requirements. Check all cables, connectors, and hydraulic lines before use. If the machine is part of a larger project site, confirm that the pipe materials, sizes, and wall thicknesses are all within the machine’s operating range.
Good preparation reduces mistakes later. In pipeline projects, a few minutes spent on setup can save hours of repair, retesting, or rework.
Step 2: Inspect the Machine and Accessories
Before welding, inspect the frame, clamps, heater plate, trimmer, and hydraulic system. Confirm that there are no visible cracks, oil leaks, damaged surfaces, or loose fittings. The heating plate should be clean and coated properly to prevent sticking. If the coating is worn or the plate surface is dirty, welding quality may be affected.
The trimmer blades should be sharp enough to cut pipe ends evenly. Dull blades can create uneven faces, which may lead to poor contact during fusion. Check the pressure gauge and control panel, and make sure all settings can be read clearly. This inspection should become a standard habit for every operator.
⚠ Safety reminder: never operate the machine if hydraulic pressure is unstable, the heater surface is damaged, or the electrical system shows signs of failure.
Step 3: Select and Position the Pipes
Choose pipes made from the same material grade and confirm that their dimensions are compatible. Butt fusion is most effective when the pipe ends are uniform and suitable for the same welding parameters. Place the pipes into the machine clamps and align them carefully so that both ends are centered and level.
Misalignment is one of the most common causes of fusion failure. If the pipe ends are not aligned properly, the melted surfaces may not join evenly. This can reduce pressure resistance and shorten service life. Take time to secure the pipes firmly before starting the trimming process.
During this stage, the machine should hold the pipes without excessive movement. Stable positioning makes the rest of the operation much easier and more accurate.
Step 4: Face the Pipe Ends
Use the trimmer to cut and smooth the pipe ends until both surfaces are flat and parallel. The goal is to remove contamination, oxidation, and uneven edges. Continue trimming until continuous shavings appear from both sides, showing that the surfaces are properly faced.
After trimming, remove the trimmer carefully and bring the pipe ends together briefly to check alignment. There should be no visible gap or obvious mismatch. If one side is higher than the other, readjust the pipe position and trim again if necessary.
This step is critical because a well-prepared pipe face ensures that heat is distributed evenly and that fusion pressure is applied across the entire joint surface.
Step 5: Clean the Pipe Ends
After facing, clean the pipe ends with a lint-free cloth or approved cleaning material. Remove dust, chips, grease, and moisture. Do not touch the prepared surfaces with bare hands after cleaning, because skin oils can affect weld quality.
Cleaning may seem simple, but it is one of the most important habits in professional welding. Even a small amount of contamination can create weak points or voids in the fusion zone. In demanding projects, cleanliness is often the difference between a reliable weld and a costly failure.
Best practice: prepare, trim, and clean each pipe immediately before welding to minimize exposure to dust and moisture.
Step 6: Heat the Pipe Ends
Once the pipe ends are prepared, place the heating plate between them and apply the recommended pressure so both surfaces contact the heater evenly. The plate must be at the correct temperature according to the material type and wall thickness. For HDPE welding, temperature control is essential for consistent results.
When the heat soak time is complete, the pipe ends should have a smooth, uniform melt pattern. Avoid overheating, because excessive heat can degrade the material and create a weak or brittle joint. Avoid underheating as well, because insufficient melting prevents full fusion.
Temperature consistency is especially important for long work shifts or large project sites. Machines with reliable control systems and strong manufacturing quality help reduce variation and support stable operation across many welds.
Step 7: Remove the Heater and Fuse the Joint
After heating, remove the plate quickly and smoothly without damaging the softened pipe ends. Immediately bring the two ends together and apply the correct fusion pressure. This step must be performed promptly because the melted surfaces begin to cool as soon as the heater is removed.
The joint should form a neat, even bead around the pipe circumference. This bead is a sign that the fusion pressure has been applied properly. However, a bead that is too large, too small, uneven, or distorted may indicate incorrect pressure, poor alignment, or improper heating time.
In manual machines, the operator must control the timing and pressure carefully. In hydraulic and automatic models, the system helps maintain the correct pressure more consistently, which is especially useful for larger pipe sizes and more demanding schedules.
Step 8: Hold and Cool the Weld
Keep the joint under pressure for the full cooling period. Do not move, bend, or disturb the welded pipe while it is still hot. Cooling time allows the molten material to solidify and form a strong bond.
Many weld failures happen because the pipe is handled too early. Even when the surface appears solid, the inside of the joint may still be soft. Always follow the recommended cooling schedule for the pipe material and diameter.
✔ Rule to remember: pressure and alignment must remain stable during cooling, not only during heating and fusion.
How to Check Weld Quality
After cooling, inspect the joint visually. Look for a uniform bead, correct symmetry, and no signs of contamination, burn marks, or misalignment. A good weld should look consistent around the full pipe circumference. If the project requires it, perform additional testing based on project specifications and local standards.
Quality control is one of the reasons professional manufacturers emphasize strict testing before delivery. In real projects, stable temperature, reliable hydraulic pressure, and accurate clamp alignment all contribute to better field performance. For critical networks, verification is not optional; it is part of responsible pipeline construction.
When operators work with well-designed equipment, they can achieve repeatable outcomes more easily. That is why many contractors prefer machines from manufacturers with strong technical support, OEM customization, and proven export experience.
Common Mistakes to Avoid
One common mistake is ignoring pipe preparation. If the ends are not properly faced and cleaned, the weld may fail even if the heating stage is correct. Another mistake is using the wrong temperature or pressure settings. Since pipe materials and diameters vary, operators must follow the correct parameters for each job.
Another issue is poor maintenance. Dirty heater plates, worn clamps, hydraulic instability, and damaged blades can all reduce weld quality. Operators should also avoid rushing the cooling stage. A strong weld requires patience and discipline.
Finally, inexperienced crews sometimes assume all butt fusion machines operate the same way. While the general method is consistent, each model may have different controls, pressure systems, or operating steps. Reading the manual and receiving training are always worthwhile.
Tip: if you work on different project sites, keep a log of temperature, pressure, heating time, and cooling time for each weld. This helps improve consistency and troubleshooting.
Why Equipment Quality Matters
High-quality equipment makes the fusion process more stable and easier to control. Reliable frames reduce vibration. Accurate heaters improve temperature consistency. Strong hydraulic systems maintain pressure during the full cycle. Together, these features support better welding performance and lower failure risk.
Manufacturers with long industry experience, such as JQ-Fusion, focus on building machines for practical use in global pipeline applications. Their product range includes hydraulic butt fusion welding machines, automatic butt fusion welding machines, electrofusion welding machines, and multi-angle pipe fitting welding machines. This variety helps contractors choose the right solution for different pipe diameters, site conditions, and production needs.
In addition, flexible OEM and ODM services allow distributors and project teams to request custom voltage, branding, machine size, color, and configuration. For international buyers, this kind of support can be a major advantage when building a local market presence or serving special project requirements.
Frequently Asked Questions
Q1: Can a butt fusion machine be used for all plastic pipes?
The machine is mainly designed for thermoplastic pipes such as HDPE, and the pipe material must be suitable for butt fusion welding. Always confirm compatibility before use.
Q2: How important is temperature control?
Temperature control is extremely important. Incorrect heating can lead to weak fusion, overheating damage, or uneven weld quality.
Q3: What causes a weak butt fusion joint?
Common causes include poor alignment, dirty pipe ends, wrong pressure, incorrect heating time, damaged equipment, and moving the pipe before cooling is complete.
Q4: Is a manual machine enough for large projects?
It can be used in some cases, but hydraulic or automatic machines are often preferred for larger diameters and higher efficiency because they improve pressure stability and reduce operator fatigue.
Q5: How often should the machine be maintained?
It should be inspected before every job and maintained regularly according to the manufacturer’s instructions. Frequent cleaning and periodic checks help extend service life and protect welding performance.
Using a butt fusion machine correctly is a combination of preparation, precision, and patience. When the operator follows the proper sequence, respects the parameters, and works with reliable equipment, the result is a strong and durable joint suitable for demanding pipeline systems. For teams handling major infrastructure work, choosing a trusted supplier and maintaining strict welding discipline are the keys to long-term success.