
Operating an HDPE pipe welding machine correctly is essential for strong, leak-free joints and safe job sites. This guide outlines practical operating steps, safety checks, and quality controls to help contractors and technicians achieve efficient butt fusion welding results.
Safety & Preparation: Start Right
Personal protective equipment (PPE): always wear welding gloves, safety goggles, and heat-resistant clothing. Ensure the work area is clear of flammable materials and well-ventilated. Check local jobsite rules and permit requirements before beginning.
Machine inspection: verify hydraulic lines, clamps, heating plate condition, and electrical connections. Confirm that the heating element reaches the required temperature and that the machine bed and clamps are clean and free of debris.
Tools, Consumables & Alignment
Gather trimming tools, cleaning cloths, scrapers, chamfering tool, and alignment guides. Make sure pipes are supported and aligned on stable saddles to prevent sagging. Proper alignment avoids stress on welds and reduces rework time.
Quick Reference: Typical Fusion Parameters
| Pipe OD (mm) | Heating Temp (°C) | Facing & Heating Time (s) |
|---|---|---|
| 63 | 200 – 220 | 20 – 30 |
| 160 | 200 – 220 | 60 – 90 |
| 315 | 200 – 220 | 120 – 180 |
Note: these values are typical starting points. Always follow the pipe manufacturer’s recommended fusion schedule and adjust for ambient conditions.
Operating Steps: Step-by-Step
1. Set up and align: Position pipe ends squarely in the clamps. Use alignment marks and support frames to maintain co-axial alignment. Confirm the clamping pressure is even on both sides.
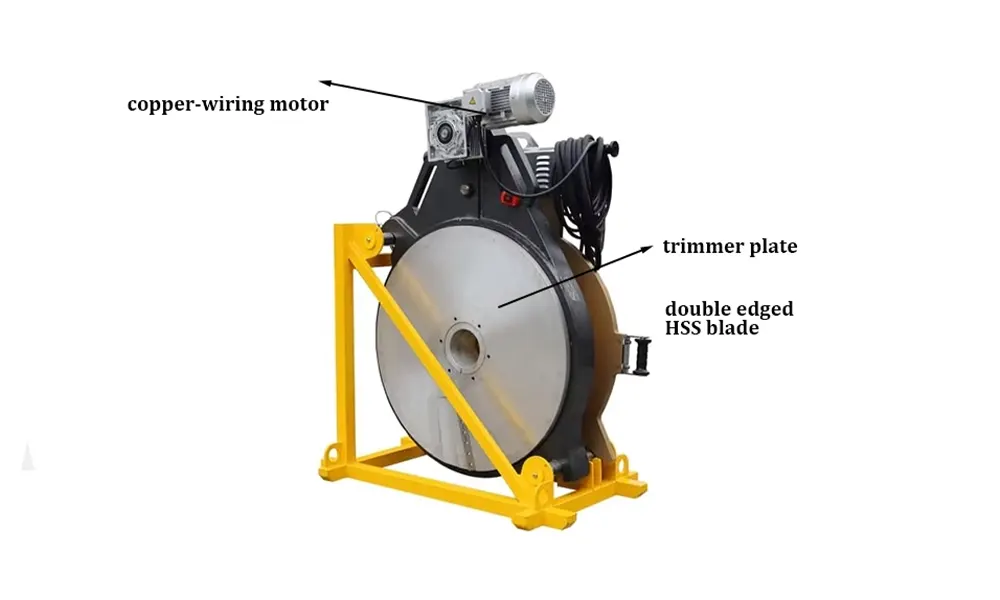
2. Facing (trimming): Use the trimmer to remove contaminated or deformed material from both pipe ends until smooth and parallel. Clean the faces with a lint-free cloth.
3. Heating plate placement: Insert the preheated heating plate between the pipe ends. Start the timer when full contact is achieved and maintain proper pressure.
4. Remove plate and join: When the heating time completes, remove the plate quickly and bring pipe ends together under controlled pressure. Hold position for the specified cooling time to allow the joint to solidify.
5. Cooling & curing: Keep clamps in place until the joint reaches the minimum cooling time in the fusion schedule. Avoid moving or stressing the joint during this period to prevent weak spots.
Quality Control & Inspection
Visually inspect the bead for uniformity and consistent extruded flash all around the circumference. Measure bead height and perform destructive or non-destructive testing according to project QA/QC plans. Record fusion parameters: temperatures, pressures, and times for traceability.
Common Defects and Causes
Cold welds — often caused by insufficient heating time or low plate temperature. Excessive flash or melt-back — typically from too much heating or pressure. Misalignment defects — caused by poor clamping or pipe support.
Troubleshooting Tips
If the heating plate sticks: clean plate surfaces and check temperature control. If alignment shifts during fusion, re-evaluate clamp condition and pipe supports. For inconsistent bead appearance, verify facing accuracy and repeat the facing step.
Maintenance & Best Practices
Keep heating plates clean and scratch-free, calibrate temperature sensors annually, and check hydraulic oil levels and seals regularly. Store the machine and consumables in dry conditions. Train operators on the specific model they will use and maintain clear fusion logs for each weld.
For industrial-grade welding machines and tailored butt fusion solutions, contact JQ-Fusion.



