Welding HDPE may look technical at first, but once you understand the process, it becomes a practical and repeatable skill. HDPE, or high-density polyethylene, is widely used in water supply, gas distribution, mining, and industrial piping because it is lightweight, corrosion-resistant, and durable. To join HDPE pipe correctly, the most common method is butt fusion machine welding, which creates a strong, leak-proof connection by heating and pressing two pipe ends together.
For beginners, the most important idea is this: HDPE welding is not about forcing the material. It is about preparing it properly, controlling temperature, and following each step with patience. When done correctly, the joint becomes as reliable as the pipe itself. In this guide, you will learn how to weld HDPE step by step, what tools you need, which mistakes to avoid, and how to check whether the weld is strong enough for real use.
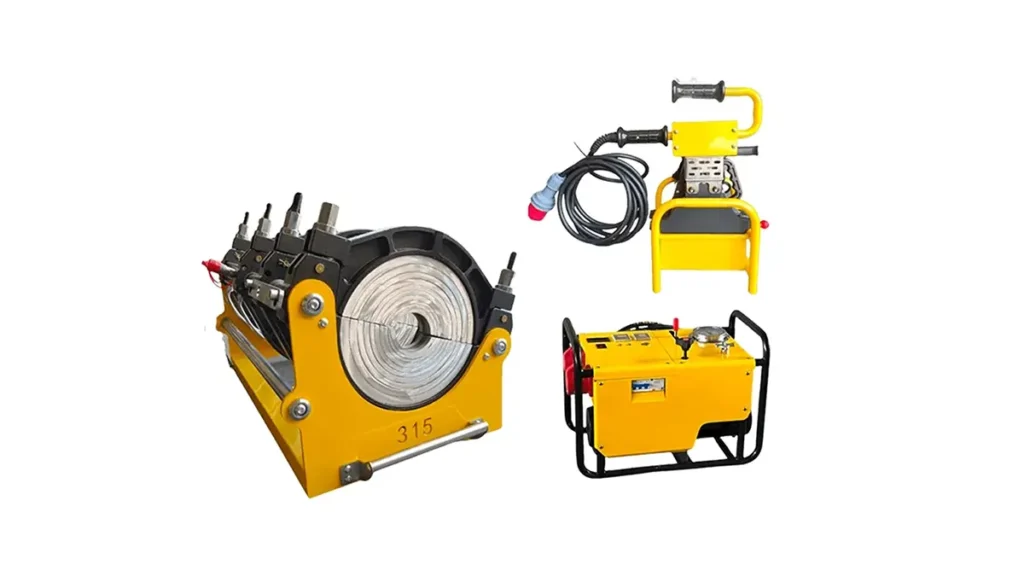
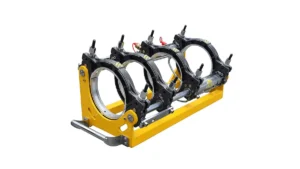
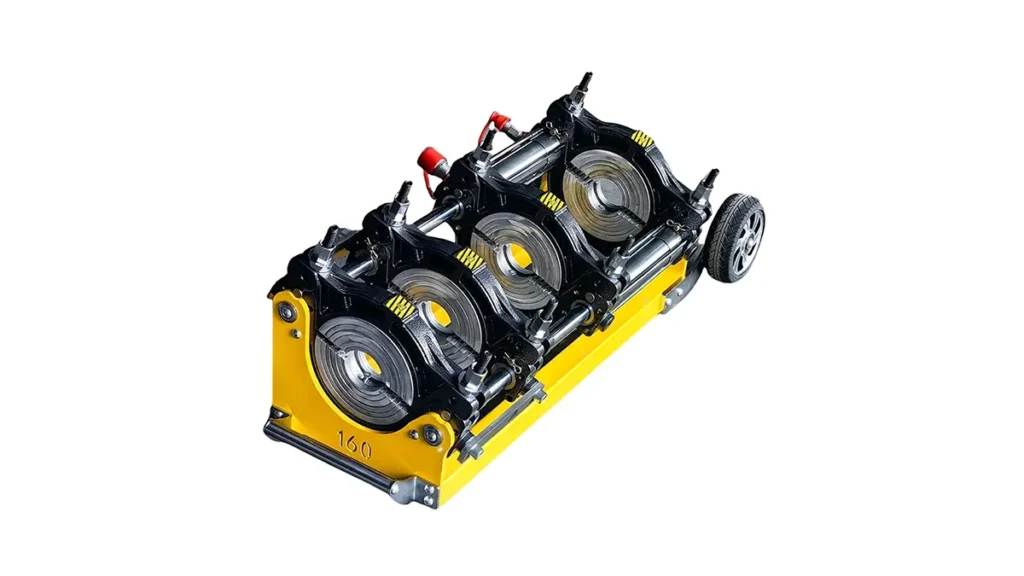
Before starting, it helps to know that different project sizes may require different types of equipment. Manual machines are often suitable for smaller jobs, while hydraulic and CNC automatic systems are better for larger or more demanding pipeline work. If you are choosing equipment for a project, using a reliable butt fusion machine can make the process safer, faster, and much more consistent.
What HDPE Welding Really Means
HDPE welding is the process of joining two polyethylene pipe ends by heating them until they reach a soft, molten state and then pressing them together under controlled pressure. After cooling, the two pieces form one continuous pipe. This method is preferred because it creates a connection that can handle pressure, vibration, and long-term use better than many mechanical joints.
🔧 Key point: A successful HDPE weld depends on clean pipe ends, correct temperature, accurate alignment, and proper cooling time.
Because HDPE softens rather than melts like metal, beginners must avoid using guesswork. Too much heat can damage the material, while too little heat can cause a weak bond. That is why a structured method is essential.
Tools and Materials You Need
To weld HDPE step by step, prepare the following tools and materials before you begin:
Basic checklist: HDPE pipes, fusion machine, pipe clamps, facer, heating plate, clean lint-free cloth, alcohol or approved cleaning solution, measuring tape, marker, and protective gloves.
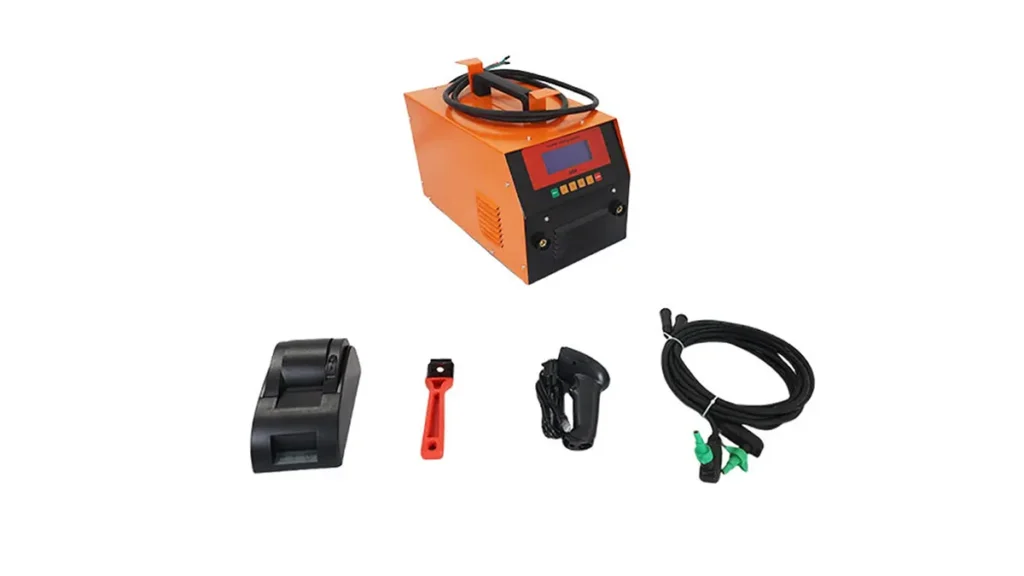
You should also have a flat working space, enough ventilation, and the correct electrical supply for your machine. If the project is large-scale, advanced welding systems can improve consistency and reduce operator error. Manufacturers with more than 20 years of experience in pipe welding equipment, such as JQ-Fusion, often provide manual, hydraulic, and CNC automatic solutions for different engineering needs.
For many contractors, choosing the right equipment is just as important as learning the technique. A stable machine helps control pressure and alignment, which are two of the biggest factors affecting weld quality. If you want to explore product categories, you can visit the butt fusion machine page for more information.
Step 1: Inspect the Pipe and Work Area
Begin by checking the pipe specification. Confirm the diameter, wall thickness, SDR rating, and material grade. Both pipe ends must match in size and standard. Even a small mismatch can cause a poor fit and weaken the joint.
Next, inspect the pipe surface for damage, dirt, grease, moisture, and deformation. HDPE surfaces must be clean and dry before welding. If the pipe ends are scratched or oval-shaped, trim or correct them before continuing. Also check that your work area is stable and free from dust, water, and sudden movement.
At this stage, safety matters. Wear gloves and keep hands away from the heating plate. Make sure the machine is on a level surface and that all clamps are working properly. Good preparation saves time later and reduces the chance of a failed weld.
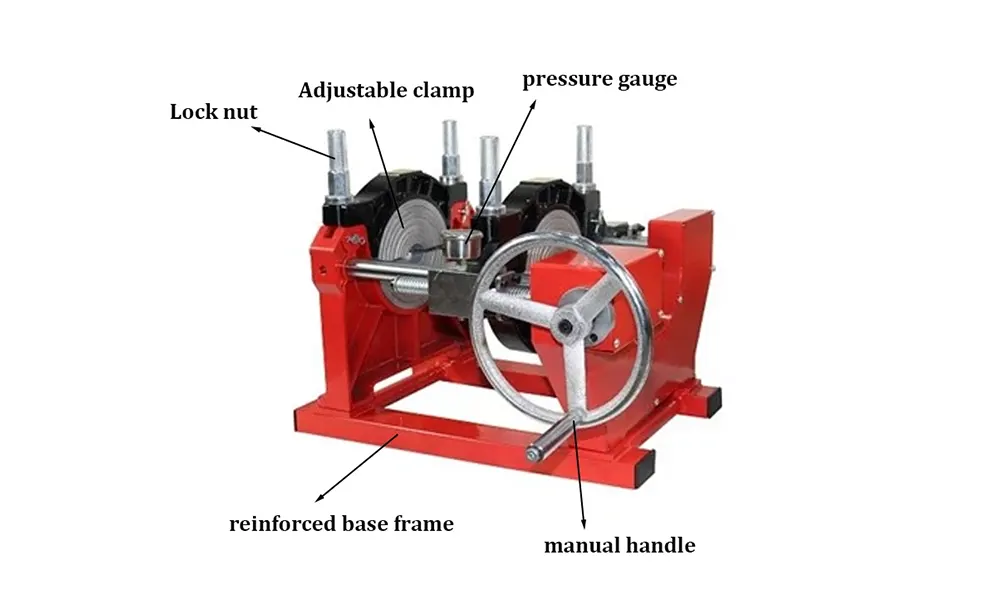
Step 2: Clamp and Align the Pipe Ends
Place both pipe sections into the machine clamps and secure them firmly. The ends should be centered and aligned so they face each other evenly. Misalignment is one of the most common beginner mistakes, and it can lead to uneven bead formation and reduced strength.
📌 Important: The pipe ends must be aligned with minimal gap and no visible offset. A good weld starts with perfect positioning.
After clamping, close the machine gently and verify that the pipe ends are even. If the pipe shifts or the clamp pressure feels unstable, adjust it before moving forward. In professional pipeline projects, machine stability is a major reason contractors prefer equipment from experienced suppliers like JQ-Fusion, especially for water and gas line installations.
Step 3: Face the Pipe Ends
Facing means cutting a thin layer from the pipe ends so they become flat, smooth, and parallel. Use the facer tool until both ends have a fresh, even surface. This step removes oxidation, dirt, and small surface irregularities that could weaken the joint.
When facing is complete, bring the ends together briefly to check the fit. There should be no visible gap between them. If you see gaps, uneven edges, or poor contact, continue facing until the surfaces match properly. Clean the pipe shavings away completely before the next step.
This stage is often underestimated, but it is one of the most important in the entire process. A clean, square face allows the heat to distribute evenly and improves fusion quality.
Step 4: Clean the Pipe Ends Thoroughly
Once the ends are faced, clean them carefully using a lint-free cloth and approved cleaning solution. Remove dust, oil, and any fine particles from the fusion area. Do not touch the cleaned surfaces with bare hands afterward, because skin oils can affect the weld.
Also clean the heating plate if needed. The heating surface must be free of contamination and ready to transfer heat evenly. A dirty plate can leave marks or create uneven temperature spots, which may affect fusion quality.
Tip: Clean once, then inspect again. In HDPE welding, repeated checking is better than repairing a bad joint later.
Step 5: Heat the Pipe Ends
Set the heating plate to the recommended temperature for HDPE welding, usually around the standard fusion range specified by the pipe and equipment manufacturer. Let the plate reach a stable temperature before using it.
Place the heating plate between the pipe ends and press the pipes gently against it under controlled pressure. The goal is to heat the surfaces evenly until a small, uniform bead begins to form. The heating time depends on pipe diameter, wall thickness, and ambient conditions, so always follow the machine chart or technical guide.
Do not overheat the pipe. Excessive heating can cause material degradation, oversized beads, and weaker joints. If the heating phase is too short, the bond may not form properly. Balance and consistency are essential.
Step 6: Remove the Heating Plate and Fuse the Pipe Ends
After the heating cycle is complete, remove the heating plate quickly and smoothly. Then bring the pipe ends together immediately under the correct fusion pressure. Speed matters here because the surfaces begin cooling as soon as the heat source is removed.
As the ends meet, maintain steady pressure so the molten surfaces merge into a continuous joint. A small external bead should form around the circumference. This bead is a normal sign that fusion has occurred, but it should look even on all sides.
⚠️ Do not twist the pipe during fusion. Any rotation can damage the bond and create stress inside the weld.
Many beginners worry about bead size, but the real concern is uniformity. If the bead is even, smooth, and symmetrical, the weld is usually on the right track. If the bead looks inconsistent, review your pressure, alignment, and heating time.
Step 7: Hold the Joint During Cooling
Once fusion is complete, keep the pipe fixed in place during the cooling period. Do not move, bend, or disturb the joint. Cooling allows the molecular bond to stabilize and gain strength.
This step is often rushed by beginners, but patience here is essential. Even if the bead looks finished, the interior structure is still setting. Premature movement can create weak spots or microscopic cracks that may fail later under pressure.
Follow the recommended cooling time based on pipe size and ambient temperature. Larger pipes usually need more time. In professional project environments, good planning helps ensure cooling time is respected, especially when working on time-sensitive installations.
Step 8: Inspect the Weld
After cooling, inspect the weld visually. The bead should be continuous, evenly shaped, and consistent around the joint. The pipe ends should remain aligned, and there should be no obvious burn marks, gaps, or contamination.
If you are working on critical infrastructure, additional testing may be required. Pressure testing, documentation, and quality inspection are common in professional pipeline jobs. Reputable manufacturers also perform strict checks on machine temperature accuracy, hydraulic pressure stability, and clamp alignment to support reliable real-world welding.
Some projects require record keeping for compliance and quality assurance. This is especially important in gas and water systems where failure is not acceptable. When machines are well-calibrated and operators follow proper steps, the weld can perform reliably for many years.
Common Beginner Mistakes to Avoid
Top mistakes: dirty pipe ends, poor alignment, incorrect heating time, moving the joint too early, and using unstable or low-quality equipment.
Another common issue is using the wrong machine for the pipe size. A machine that is too small may not hold the pipe securely, while one with poor temperature control may create inconsistent welds. Choosing the right tool is part of welding correctly.
Contractors who work on varied projects often need flexible equipment options. JQ-Fusion offers customizable solutions for machine size, voltage, color, branding, and project-specific configurations, which can be useful for distributors and engineering teams seeking long-term value.
Why Equipment Quality Matters
Even if the operator follows every step correctly, poor equipment can still produce weak joints. Stable heat control, precise clamping, and accurate pressure settings all affect the final result. That is why professional welders often invest in reliable fusion systems instead of relying on trial and error.
For large-scale work, advanced hydraulic and automatic systems can improve speed and reduce variation between welds. This is especially valuable in projects with strict deadlines or high safety requirements. Suppliers with global support, technical guidance, and fast logistics can also make project execution easier.
When you choose a machine from a manufacturer with proven experience, strong quality control, and international certification such as SGS, you are not only buying equipment. You are also reducing project risk and improving productivity.
Practical Tips for Better HDPE Welds
To improve your results, always verify pipe size compatibility before starting. Keep tools clean and organized. Review the heating chart for the specific pipe size you are using. Practice on test pieces if you are a beginner. And never hurry the cooling stage.
It also helps to work with equipment that is designed for long-term reliability. A well-built fusion machine can make training easier and results more repeatable. If your application involves water supply systems, gas distribution, mining pipelines, or industrial installations, dependable equipment is essential for maintaining quality across every joint.
With time, HDPE welding becomes much easier because the process is highly repeatable. Once you understand the sequence, you can apply the same method across many pipe sizes and installation conditions.
Conclusion
Welding HDPE step by step is a skill that combines preparation, precision, and patience. Start by checking the pipe and the work area, then clamp, face, clean, heat, fuse, cool, and inspect. Each stage matters, and skipping one can reduce the strength of the final joint. For beginners, the goal is not speed but consistency.
With the right equipment and a careful process, HDPE fusion can produce durable, leak-free connections for many types of pipeline projects. Whether you are working on small installations or large industrial systems, understanding the basics will help you weld with more confidence and fewer mistakes.
Frequently Asked Questions
Q1: Can beginners weld HDPE successfully?
Yes. Beginners can weld HDPE successfully if they follow the correct steps, keep the pipe ends clean, and use proper equipment with stable temperature and pressure control.
Q2: What is the most important step in HDPE welding?
Pipe preparation is the most important part. Proper facing, cleaning, alignment, and heating all have a direct impact on weld quality.
Q3: How do I know if an HDPE weld is good?
A good weld usually has a uniform bead, correct alignment, and no signs of contamination, overheating, or gaps. In critical projects, pressure testing may also be required.
Q4: Why do some HDPE welds fail?
Common reasons include poor cleaning, incorrect heating time, unstable pressure, misalignment, and moving the joint before it has cooled properly.
Q5: Do I need a special machine to weld HDPE?
Yes. A proper fusion machine is needed for reliable HDPE welding. The best choice depends on pipe size, project type, and whether you need manual, hydraulic, or automatic operation.