Installing an HDPE welding machine may look intimidating at first, but the process becomes much easier when it is broken into clear steps. Whether you are preparing for a water supply line, a gas distribution network, or an industrial pipeline project, a properly installed machine is the foundation of a reliable fusion joint. A successful installation does not only protect the equipment; it also improves welding accuracy, reduces downtime, and helps beginners build confidence from the very first operation.
Before starting, always check that your work area is clean, flat, dry, and spacious enough for pipe handling. An HDPE welding machine needs stable positioning, proper power supply, and carefully aligned components to function at its best. If you are new to pipe fusion, it is a good idea to learn the machine structure first, then follow each step carefully instead of rushing through the setup.
⚠ Key Tip: The quality of installation directly affects welding quality. Even a small alignment error can lead to uneven heating, poor joint strength, or rework later in the project.
Understanding the Main Parts of an HDPE Welding Machine
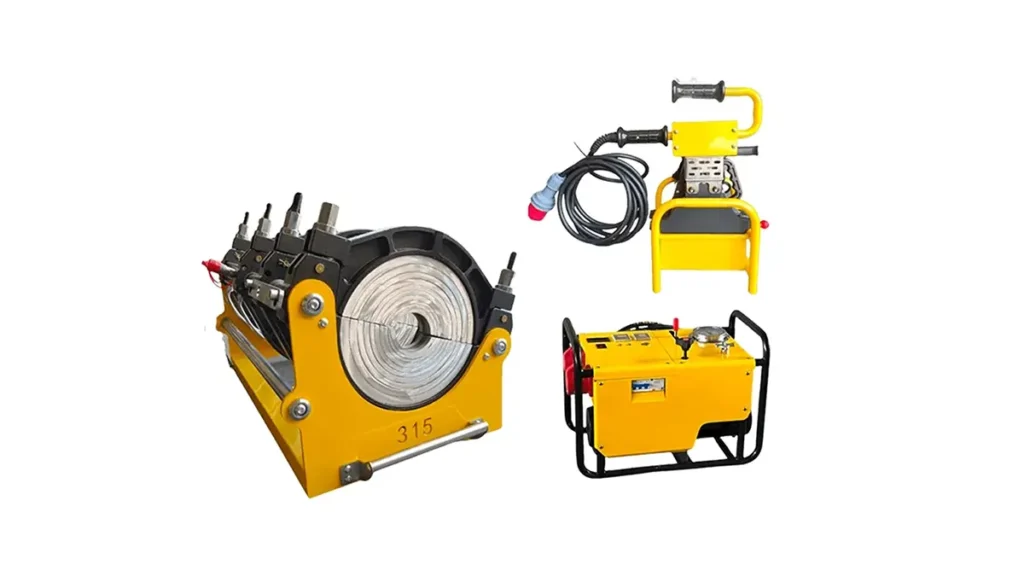
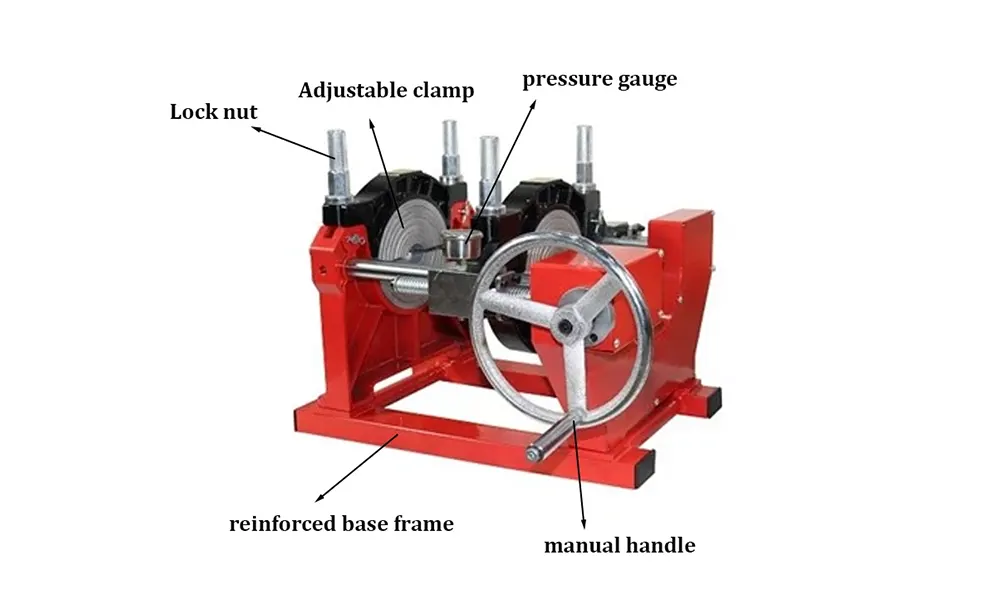
A beginner should first identify the main components of the machine. Most HDPE butt fusion equipment includes a main frame, clamp system, facing tool, heating plate, hydraulic unit, and control panel. Each part has a specific role. The clamps hold the pipe ends securely. The facing tool trims the pipe surfaces so they are smooth and even. The heating plate melts the pipe ends at the correct temperature. The hydraulic unit provides pressure, while the control panel helps regulate the process.
Knowing these parts before installation helps you avoid confusion during assembly. If your machine is from a professional manufacturer such as JQ-Fusion butt fusion machine, the machine structure is usually designed for easier operation, stable performance, and better compatibility with different pipe sizes. This is especially helpful for contractors who need dependable equipment for multiple project sites.
Step 1: Prepare the Installation Site
The first step is to choose the right place for installation. A flat and level surface is essential because the machine must stay balanced during pipe clamping and welding. Uneven ground can cause alignment problems and affect the quality of the fusion joint. If you are working outdoors, make sure the site is protected from rain, excessive dust, and strong wind whenever possible.
Check the available space around the machine. You need room for pipe movement, operator access, and safe handling of the heating plate and facing tool. Also confirm the power supply matches the machine requirements, including voltage and frequency. A stable power source is especially important for hydraulic and automatic systems, because voltage fluctuations may influence heating precision and machine performance.
✅ Practical Reminder: Keep all tools, cleaning cloths, and measuring devices within reach before installation starts. This saves time and reduces interruptions during setup.
Step 2: Unpack and Inspect the Machine
After the site is ready, carefully unpack the machine and check every part against the packing list. Inspect the main frame for transport damage, verify that all bolts, screws, and accessories are included, and confirm that the heating plate surface is clean and undamaged. This is also the right time to check the cable, hydraulic hose, and control components for any visible issues.
If any part appears damaged, do not start installation immediately. Contact the supplier or technical team first. Reliable manufacturers usually provide responsive support and spare part guidance, which can prevent costly delays. A careful inspection at this stage ensures that the machine is ready for safe assembly and reduces the chance of troubleshooting later.
Step 3: Assemble the Main Frame and Clamps
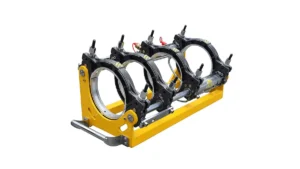
Place the main frame on the prepared surface and adjust it until it is level. Once the frame is stable, install the clamps according to the machine manual. The clamps must move smoothly and hold the pipe ends firmly without slipping. Proper clamp installation is critical because pipe alignment is one of the most important factors in butt fusion welding.
When attaching the clamps, tighten the fasteners evenly. Do not over-tighten one side before the other, as this can create slight distortion in the frame. After assembly, test the clamp movement by opening and closing them several times. The motion should be smooth, balanced, and secure. Beginners often overlook this simple check, but it is a valuable step for preventing future welding errors.
Step 4: Install the Facing Tool
The facing tool is responsible for trimming the pipe ends so they are flat and parallel. Mount the tool securely in its designated position and confirm that the blades are sharp, clean, and correctly fitted. If the tool is misaligned or dull, the pipe surface will not be prepared properly, and the welding joint may become weak or uneven.
Before using the facing tool in a real project, run a short test to confirm that it starts and stops properly. Listen for unusual noises and check whether the chip removal is smooth. A well-installed facing tool improves preparation quality and helps the heating process begin on a perfectly matched surface.
★ Beginner’s Note: Never skip pipe facing. Clean and even pipe ends are essential for a strong fusion joint, especially in pressure pipeline systems.
Step 5: Position the Heating Plate Correctly
The heating plate must be placed in the correct holder and kept stable during operation. Check that the surface is clean and free from dust, plastic residue, or scratches. A contaminated plate can affect heat transfer and create inconsistent melting on the pipe ends. For best results, always follow the recommended temperature setting from the machine manual and the pipe material specification.
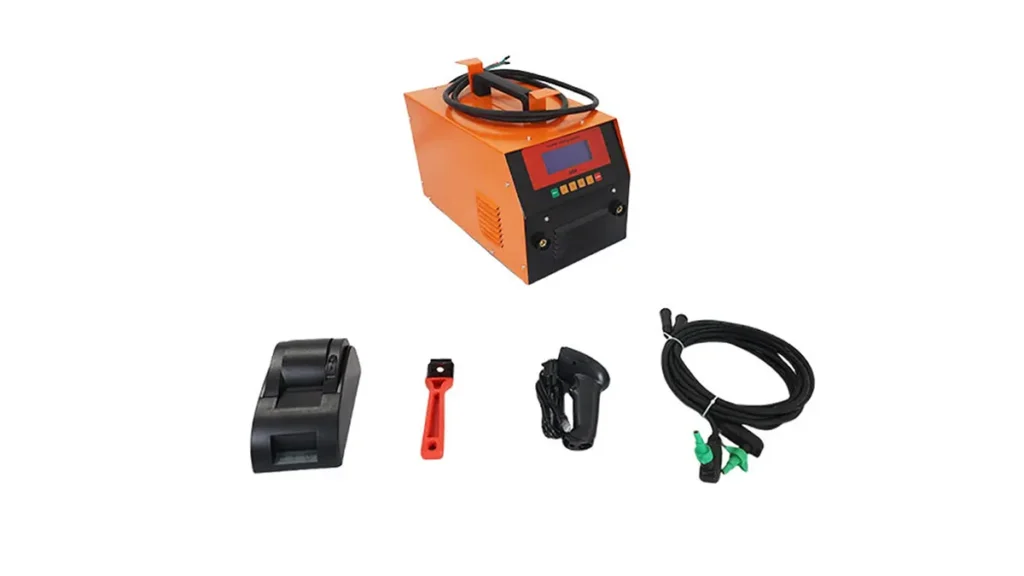
Once the plate is installed, allow it to heat up fully before starting welding preparation. Use the control panel to monitor temperature and make sure it stays within the required range. Some advanced machines feature digital temperature control, which makes it easier for beginners to maintain accuracy and repeatability.
Step 6: Connect the Hydraulic or Power System
If your machine uses a hydraulic system, connect the hoses carefully and make sure the fittings are tight. Check for any leakage before operation. Hydraulic pressure must be stable because it controls the fusion force applied during the welding cycle. For automatic systems, verify that the power cables and signal connections are secure and properly grounded.
This step is important because unstable pressure or poor electrical connection can affect the entire welding sequence. Professional equipment from experienced manufacturers is often built with strong testing standards and quality control, which helps reduce these risks. If your supplier provides technical guidance, follow it closely during the first setup.
Step 7: Calibrate and Test the Machine
Before using the machine for actual pipe welding, perform a full calibration test. Confirm the clamp alignment, heating temperature, hydraulic movement, and timer settings. If the machine includes a digital display or automatic control system, make sure the readings match the required parameters for the pipe size and material.
Testing is also the best way to identify small issues early. For example, if the clamp pressure is uneven or the heating plate takes too long to stabilize, you can correct the problem before starting the project. Beginners should treat calibration as a safety and quality step, not as an optional extra.
🔧 Important: Always test the machine with a short trial process before production welding. This helps verify alignment, temperature stability, and pressure performance.
Step 8: Learn the Basic Welding Workflow
After installation is complete, beginners should understand the basic fusion workflow. The process usually includes pipe clamping, facing, cleaning, heating, removing the heating plate, and joining the pipe ends under controlled pressure. Each stage must be done in sequence. If one step is rushed or skipped, the final weld can be weaker than expected.
It is also important to clean the pipe surfaces before heating. Dust, moisture, and oil can reduce bonding quality. During the heating and joining stages, follow the recommended time and pressure settings for the pipe diameter and wall thickness. Good machines are designed to support stable and repeatable results, which is why many contractors prefer machines with strong performance and reliable support.
Choosing the Right Machine for Your Project
Not every HDPE project needs the same type of welding machine. Small installations may only require a manual model, while larger pipeline projects often benefit from hydraulic or CNC automatic systems. The right choice depends on pipe diameter, project scale, operator experience, and required production efficiency. If you are planning a long-term investment, choose equipment that offers stable stock supply, customization, and after-sales support.
A trusted supplier should provide multiple product options, including manual, hydraulic, and automatic models, so you can match the machine to the job. For example, JQ-Fusion offers a wide range of welding solutions for different pipeline needs, along with OEM and ODM customization to support distributors and contractors worldwide. If you want to learn more about product options and technical support, you can visit the official website at https://jq-fusionwelding.com/.
How to Avoid Common Beginner Mistakes
Beginners often make the same few mistakes when installing or using an HDPE welding machine. The most common ones are poor leveling, loose clamp installation, dirty pipe surfaces, incorrect temperature settings, and ignoring calibration checks. These problems may seem small, but they can seriously affect weld quality. The good news is that each one is preventable with careful setup and attention to detail.
Another common issue is selecting the wrong machine for the project. A machine that is too small may not support the required pipe diameter, while an oversized or overly complex unit may be difficult to operate efficiently. That is why many professionals prefer equipment with clear technical support, stable performance, and flexible customization options.
Why Professional Support Matters
Even when a machine is easy to install, professional support still matters. Experienced manufacturers can guide users through machine selection, installation, operation, and maintenance. This is especially useful for first-time buyers and project teams working under tight schedules. Strong technical support can also help reduce downtime when questions arise during setup or operation.
JQ-Fusion, for example, focuses on reliable butt fusion solutions for global pipeline projects and supports a wide range of pipe diameters. Their experience in manufacturing and quality control makes the installation process smoother for beginners and helps ensure the machine performs consistently in real-world conditions.
Conclusion
Installing an HDPE welding machine is not difficult when you follow a proper step-by-step process. Start with a clean and level site, inspect all parts carefully, assemble the frame and clamps correctly, install the facing tool and heating plate, connect the hydraulic or power system, and then calibrate the machine before use. Each step contributes to welding stability, joint strength, and long-term equipment reliability.
For beginners, the most important rule is simple: do not rush. Take time to prepare the site, confirm the machine setup, and test every function before welding begins. With the right machine, clear instructions, and professional support, you can complete installation confidently and achieve consistent results on every project.
Frequently Asked Questions
Q1: What is the most important step before installing an HDPE welding machine?
The most important step is preparing a flat, stable, and clean installation site. Without proper leveling, the machine may not align correctly during welding.
Q2: Can beginners install the machine without technical help?
Yes, many beginners can install it by following the manual carefully, but technical support is strongly recommended for first-time users or large projects.
Q3: Why is clamp alignment so important?
Clamp alignment keeps the pipe ends even and secure, which is essential for a strong and consistent fusion joint.
Q4: How do I know if the heating plate is ready?
The heating plate is ready when it reaches the correct temperature shown on the control panel and remains stable before starting the fusion cycle.
Q5: What should I do if the machine shows unstable pressure or temperature?
Stop the process, inspect the power or hydraulic connections, and consult the supplier’s technical team before continuing operation.