Welding HDPE pipe is one of the most reliable ways to build strong, leak-free pipeline systems for water supply, gas distribution, mining, and industrial projects. When done correctly, a fused joint can be as strong as the pipe itself, which is why butt fusion has become the preferred method for many contractors and installers. If you are new to the process, this guide will walk you through each step in a clear, practical way so you can understand not only how to weld HDPE pipe, but also how to do it safely, accurately, and consistently.
Before starting, it is important to understand that HDPE fusion is not about “melting and pressing” the pipes together randomly. It is a controlled process that depends on temperature, pressure, alignment, heating time, and cooling time. Every stage matters. Even a small mistake in one step can affect the strength of the finished joint. That is why good equipment, proper preparation, and operator discipline are all essential for successful results.
Key idea: A strong HDPE weld starts long before the heater plate touches the pipe. Clean pipe ends, correct clamping, and proper parameter control are what create a durable fusion joint.
What Is HDPE Butt Fusion Welding?
Butt fusion welding is a method used to join two HDPE pipe ends by heating them until the material becomes soft and then pressing them together under controlled force. Once the joint cools, the two pieces form a continuous pipe section. This technique is widely used because it creates a smooth internal bore, minimizes flow resistance, and offers excellent long-term reliability.
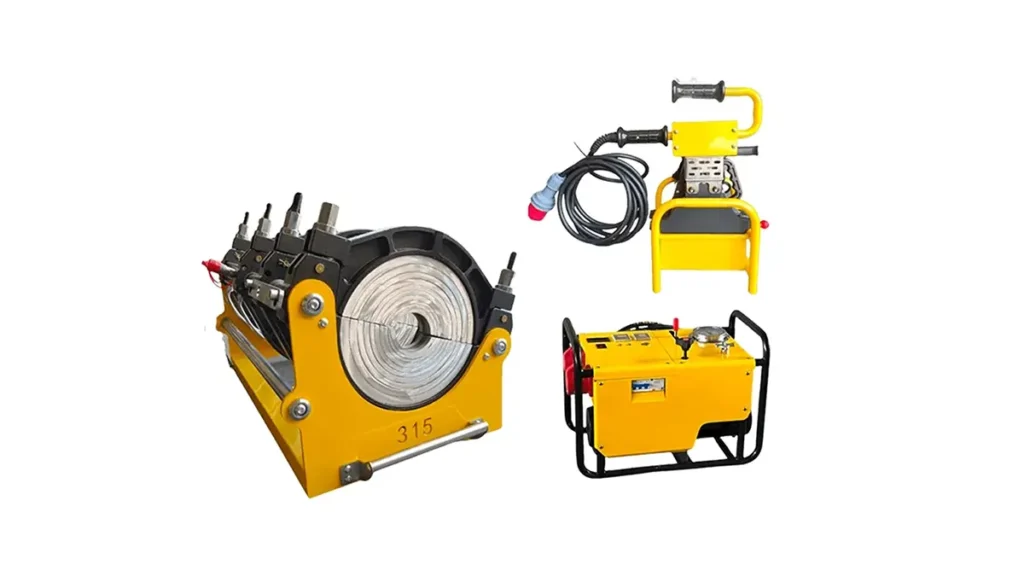
Compared with mechanical joints, butt fusion reduces the risk of leakage and eliminates many common maintenance issues. It is especially suitable for long-distance pipeline projects, underground systems, and applications where durability is critical. To learn more about professional equipment used in this process, you can explore a butt fusion machine designed for different pipe sizes and project requirements.
Tools and Materials You Need
Before welding, make sure you have the correct tools and all required materials ready. Preparation saves time and reduces the risk of mistakes during the fusion cycle. The exact setup may vary depending on pipe diameter and machine type, but the basic equipment is usually the same.
You will typically need:
• HDPE pipes of the same material grade and SDR
• A butt fusion welding machine
• Pipe cutters or a saw with a clean cutting edge
• Facing tool or facer
• Heater plate with temperature control
• Clean lint-free cloths
• Alcohol or approved cleaning agent
• Measuring tools and alignment accessories
• Gloves and personal protective equipment
Using clean and compatible materials is crucial. Never assume all HDPE pipes can be fused together just because they are made from the same plastic. Check the pipe grade, pressure rating, and manufacturer recommendations before starting.
Step 1: Inspect the Pipe and Machine
Start by checking the pipe ends and the welding machine. Look for cracks, contamination, deformation, or any signs of damage. The pipe ends should be dry, clean, and free from dirt or oil. The machine should also be in good condition, with stable clamps, a working heater plate, and accurate pressure control.
If the machine is not calibrated properly, the weld quality may suffer even if the operator follows the correct procedure. This is one reason why many projects rely on high-quality welding systems from experienced manufacturers such as JQ-Fusion, especially for demanding industrial and municipal applications.
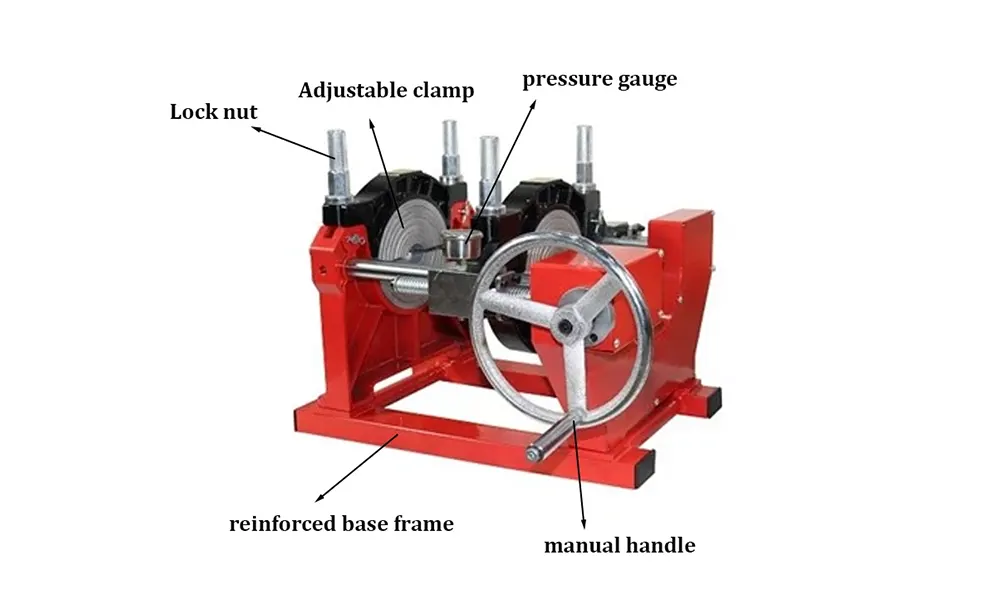
Step 2: Secure the Pipes in the Clamps
Place both pipe ends into the machine clamps and tighten them carefully. The pipes must be aligned on the same axis, with no visible offset. Poor alignment can create weak spots and reduce joint performance. Take time to adjust the clamps until both ends are level and centered.
Important: Misalignment is one of the most common causes of failed fusion joints. Even small offsets can lead to stress concentration and lower service life.
For larger pipes, use support stands or additional helpers if needed. Heavy pipe sections can shift during clamping, so stable support is essential. The goal is to create a secure setup before you begin facing and heating.
Step 3: Face the Pipe Ends
Facing is the process of trimming the pipe ends so they become smooth, flat, and parallel. The facer removes a thin layer from both ends and creates a perfect surface for welding. This step ensures that the entire pipe face will contact the heater plate evenly.
After facing, bring the pipe ends together briefly to check the gap and alignment. The surfaces should touch evenly with no visible light between them. Remove the facer carefully and avoid touching the prepared surfaces with bare hands, since oils and dirt can affect weld quality.
Step 4: Clean the Pipe Ends
Once the pipe ends are faced, clean them with a lint-free cloth and approved cleaning agent. This removes fine dust, shavings, and surface contamination. Cleaning is often overlooked, but it is one of the simplest ways to improve fusion consistency.
The area inside the clamp should also be checked. If debris remains around the pipe ends or machine parts, it may interfere with alignment or cause contamination during the weld. Clean work habits are a major part of professional fusion practice.
Step 5: Heat the Heater Plate
Set the heater plate to the recommended welding temperature, usually around 200–220°C depending on the material and manufacturer guidance. Allow the plate to reach a stable temperature before use. An unstable or poorly heated plate can create uneven softening and weaken the fusion interface.
The heater surface should be clean and undamaged. If material residue is present, wipe it according to the equipment instructions. A clean heater plate helps transfer heat evenly and improves weld reliability.
Pro tip: Always follow the pipe and machine manufacturer’s recommended heating time and pressure values. Do not guess. Fusion parameters matter more than speed.
Step 6: Perform the Heating Cycle
When the heater plate is ready, place it between the two pipe ends and move the pipes against it with controlled pressure. The goal is to create a uniform melt bead around each pipe end. During this stage, the material becomes soft enough for fusion, but it should not be overheated or burned.
Watch the bead formation carefully. A consistent bead indicates that the heat is being distributed properly. If the bead looks uneven, the setup may need to be rechecked before proceeding. Accurate timing is essential because underheating and overheating can both damage the joint quality.
Step 7: Remove the Heater and Join the Pipes
After the heating time is complete, separate the pipe ends from the heater plate and remove the plate quickly and cleanly. Immediately bring the softened ends together and apply the specified fusion pressure. This step must be done smoothly and without delay because the plastic begins to cool as soon as it leaves the heater.
The joint should be formed in one controlled motion. Do not twist or rotate the pipes while joining them. Rotation can disturb the molten interface and weaken the bond. A proper butt fusion joint will show a uniform external bead around the circumference.
Remember: Once the joint is made, avoid re-adjusting the alignment. Movement during cooling can compromise the final weld.
Step 8: Hold and Cool the Weld
Maintain pressure during the initial cooling period as specified by the welding procedure. This allows the softened material to solidify under controlled conditions and form a strong molecular bond. Cooling is not optional; it is a necessary part of the fusion cycle.
After the initial hold time, allow the joint to cool naturally. Do not use water or forced cooling unless the procedure specifically allows it. Rapid cooling can introduce stress into the weld and reduce long-term performance.
Step 9: Inspect the Finished Weld
Once the weld has cooled enough to handle, inspect the joint visually. A good butt fusion weld usually has a symmetrical bead, consistent shape, and no obvious contamination or severe distortion. The pipe should remain aligned, and the bead should appear even along the full circumference.
For critical projects, additional inspection or testing may be required, especially in gas or high-pressure systems. In those cases, follow the project specifications and local standards carefully. Quality control is a major part of successful pipeline construction, not an optional extra.
Common Mistakes to Avoid
Even beginners can achieve good results if they pay attention to the details. However, a few common mistakes often cause problems during HDPE fusion.
Avoid these errors:
• Using dirty or wet pipe ends
• Incorrect alignment in the clamps
• Wrong heating temperature or timing
• Delays when removing the heater and joining the pipes
• Moving the joint during cooling
• Mixing pipes of incompatible grades or sizes
Most welding failures are not caused by one major disaster. They are usually the result of small, preventable issues repeated throughout the process. Careful preparation and strict procedure control are the best ways to avoid trouble.
Why Equipment Quality Matters
For beginners, it may be tempting to focus only on technique. But the quality of the welding machine also plays a major role in the final outcome. A stable hydraulic system, accurate temperature control, and reliable clamp alignment help operators achieve consistent welds. This is especially important on large projects where many joints must meet the same standard.
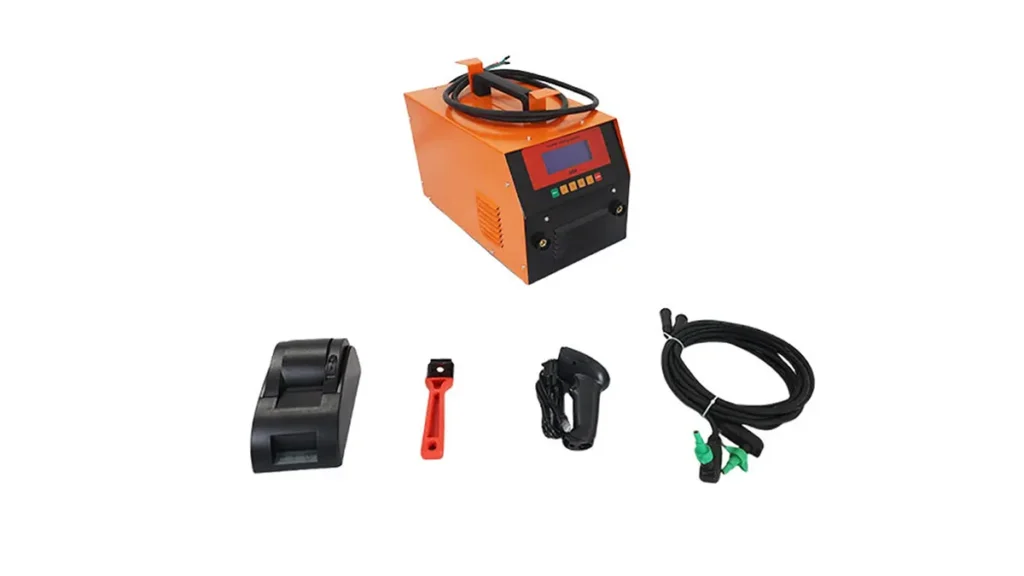
Professional manufacturers like JQ-Fusion provide solutions for different project needs, including manual, hydraulic, and automatic systems. Their equipment is used in water supply systems, gas networks, mining projects, and industrial pipeline installations around the world. If you need dependable machines for repeated field use, working with an experienced supplier can save time and reduce long-term risk.
For companies looking to expand their market or customize equipment for specific job requirements, OEM and ODM support can be especially valuable. Options such as voltage, branding, machine size, and design adjustments help contractors and distributors build better project compatibility and stronger market positioning.
Safety Tips for Beginners
HDPE welding is generally straightforward, but safety should always come first. Wear protective gloves, safety glasses, and suitable work clothing. Keep hands away from heated surfaces and moving parts. Make sure the work area is clean, stable, and free from unnecessary distractions.
Good ventilation is also important, especially in enclosed spaces. While HDPE is widely used because of its practical performance, welding should still be carried out under safe working conditions. If you are unsure about a machine setting or procedure, consult the equipment manual or seek technical support before continuing.
Final Thoughts
Learning how to weld HDPE pipe step by step becomes much easier when you focus on preparation, alignment, temperature control, and cooling discipline. Butt fusion is a highly effective joining method because it creates durable, leak-resistant joints suitable for demanding pipeline applications. With the right machine, the correct parameters, and careful execution, even beginners can develop reliable fusion results over time.
Whether you are working on a small water line or a large industrial pipeline, the process is the same: prepare carefully, weld precisely, and inspect thoroughly. That combination of knowledge and discipline is what turns a basic fusion task into a professional-quality joint.
Frequently Asked Questions
Q1: Can HDPE pipes be welded without special equipment?
A1: For proper butt fusion, specialized welding equipment is recommended because temperature, alignment, and pressure must be controlled accurately.
Q2: How long does an HDPE butt fusion joint need to cool?
A2: Cooling time depends on pipe diameter, wall thickness, and the welding procedure, so always follow the manufacturer’s recommended cycle.
Q3: What causes a weak HDPE weld?
A3: Common causes include poor alignment, contamination, incorrect heating temperature, insufficient pressure, or movement during cooling.
Q4: Can different HDPE pipe grades be fused together?
A4: Not always. Compatibility depends on material grade, pressure rating, and manufacturer guidance. Check before welding.
Q5: Why is butt fusion preferred for large pipeline projects?
A5: It creates strong, smooth, and leak-resistant joints with excellent long-term performance, making it ideal for water, gas, and industrial systems.