
Butt fusion welding is the industry standard for joining HDPE pipes for water, gas, mining, and industrial pipelines. This guide explains how to operate, set up, and maintain an HDPE plastic pipe butt fusion machine so your joints are safe, leak-free, and durable.
What Is Butt Fusion and Why It Matters
Butt fusion joins two HDPE pipe ends by heating them and pressing them together to form a homogeneous weld. This process produces high-strength joints with excellent long-term performance—critical for infrastructure projects where reliability and corrosion resistance matter.
Key Benefits
Leak-free connections, uniform molecular bonding, and suitability for large-diameter pipelines are the primary advantages. Proper machine setup and operator technique determine weld quality more than machine brand alone.
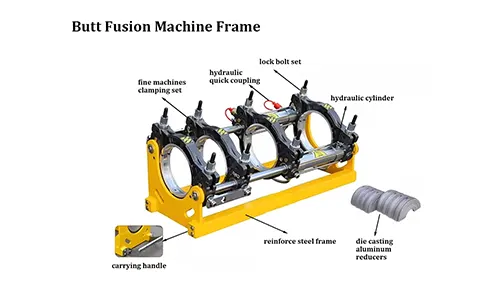
Before You Start: Safety & Preparation
Always begin with a safety briefing. Confirm operator PPE (heat-resistant gloves, eye protection, safety boots), and ensure the work area is level, clean, and free of wind or heavy dust. Confirm the pipe material is PE100/PE80 as applicable and the machine is rated for the pipe diameter.
Checklist
Essential items: pipe cutters, facing tool (trimmer), alignment clamps, heating plate, backing plates, cleaning cloth, and documentation of fusion parameters (temperature, pressure, heating time).
Step-by-Step Setup
1. Mounting and Clamping
Position the machine on stable ground. Place pipes in the clamps, align the ends, and center them on the carriage. Tighten clamps evenly to avoid eccentricity.
2. Facing (Trimming)
Use the facing tool to square and clean both pipe ends. The faces must be flat and smooth—no burns, gouges, or contamination. Verify dimensions against pipe spec.
3. Heating
Set the heating plate to the recommended temperature (typically 200–260°C depending on material grade). Press the plate gently against the pipe ends until a uniform melt bead (fusion beads) forms. Follow manufacturer time and pressure charts.
4. Fusion and Cooling
Retract the heater and bring pipe ends together under controlled pressure. Maintain the specified fusion force until the joint cools sufficiently. Do not disturb clamps until the cooling time has elapsed.
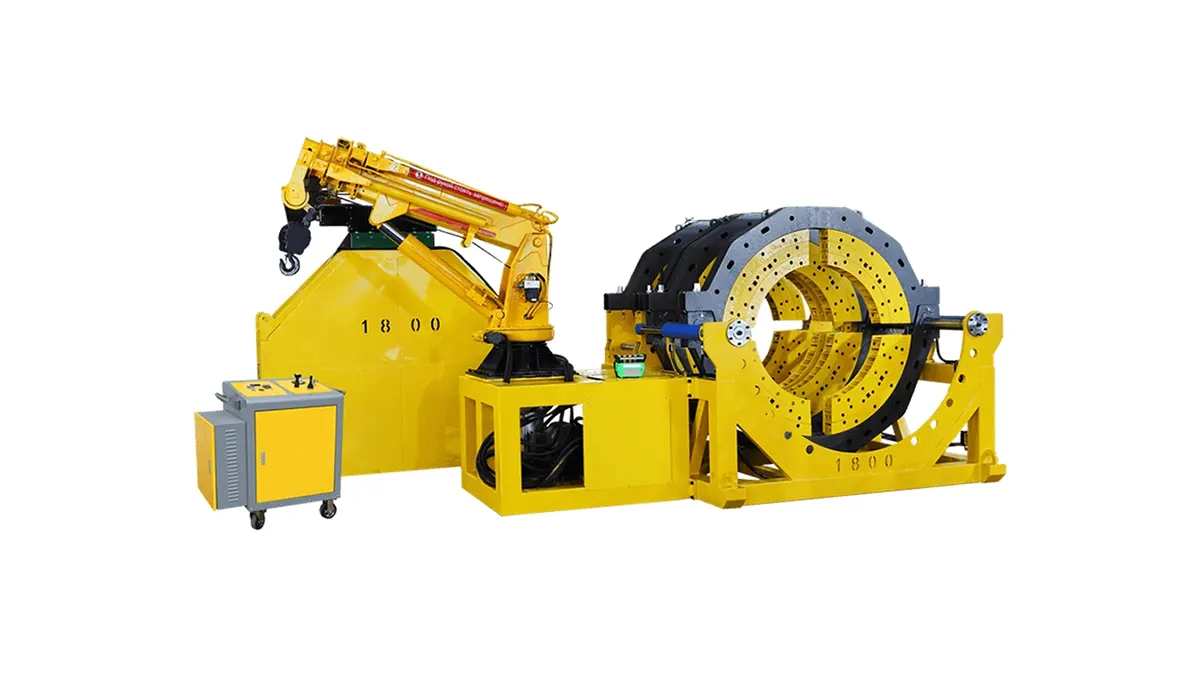
Operating Tips for Consistent Welds
Surface cleanliness and proper facing are the most common determinants of weld quality. Avoid overheating and do not remove the heater prematurely. Use manufacturer-specified heating time and pressure charts for the pipe diameter and wall thickness.
Common Parameters
Typical settings include heater temperature and facing/hitting force. Always log each weld: pipe size, material grade, ambient temperature, heater temp, pressure, heating time, and cooling time.
Maintenance Schedule (Quick Reference)
| Interval | Item | Action |
|---|---|---|
| Daily | Clamps & Alignment Rails | Clean, lubricate sliding parts, check for wear |
| Weekly | Heating Plate Surface | Inspect for damage, clean with recommended solvent |
| Monthly | Hydraulic System (if applicable) | Check fluid level, hoses, and fittings for leaks |
| Annually | Calibration | Professional calibration of pressure gauges and control electronics |
Routine Maintenance Tasks
Keep a logbook for each machine. Replace worn clamps, check heater insulating surfaces, and ensure the trimmer blade is sharp for clean facing. Inspect electrical connections for corrosion and secure bolts and screws periodically.
Hydraulic System Care
Monitor hydraulic oil quality and level. Change filters per manufacturer recommendations. Bleed air pockets and inspect seals for degradation. Low performance often indicates contaminated oil or worn pump seals.
Troubleshooting Common Issues
Poor Bead or Cold Weld
Symptoms: weak joint, visible gap, or insufficient bead. Causes: incorrect heating temperature/time, poor facing, or contamination. Action: verify heater temperature, reface pipe ends, and repeat welding parameters.
Eccentric Welds or Misalignment
Symptoms: uneven bead or offset pipe ends. Causes: loose clamps or poor initial alignment. Action: reclamp, reface if needed, and ensure rails and clamps are free of debris.
Best Practices for Field Use
Protect the heating plate from wind and dust using temporary windbreaks. Use a level to ensure machine and pipe alignment. Avoid fusion during heavy rain unless a covered workstation is available. Train operators on standard fusion procedures and local regulations.
Storage & Transport
Store machines in dry, covered locations. Secure moving parts and protect the heating plate surface during transport with a rigid cover. Keep spare parts (gaskets, heater mats, trimmer blades) on-site for quick repairs.
Quality Assurance & Documentation
Record every weld with parameters and operator ID to maintain traceability. For critical projects, perform destructive or non-destructive testing per project specifications. Consistent documentation reduces rework and supports long-term warranties.
Contact & Support
For equipment options, replacement parts, and technical assistance, contact JQ-Fusion through their official website for model-specific guidance and spare parts recommendations.



